September 26, 2009

Laura’s sketch 35

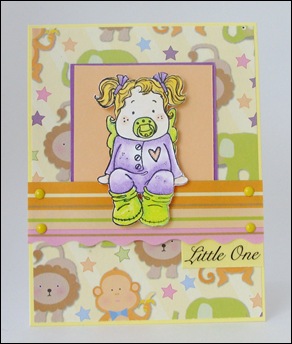
Laura’s sketch 35 was a lovely sketch to work on. Once I knew what image I was going to use, the rest was a breeze :). Otherwise it takes me eons to decide what DPs I want in a particular card!

DSC03779

  • Stamps: Magnolia
  • CS and PP: DCWV and Bazzill
  • Prismacolor pencils, OMS, Sticker, pop dots, brads

September 21, 2009

CPS 134

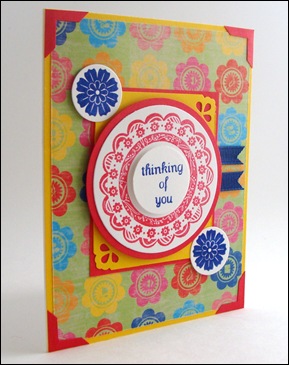
Here’s my take on the CPS 134 sketch. This is card is a perfect case of when a crafter is so proud of something that an observer will not care about. What am I proud of in this card? I combined two different stamp sets seamlessly :), that’s what I would like to believe. The small flowers are from PTI Guidelines Two and the main image is from Inkadinkado Borders. I started with a red and yellow theme but when it became too hot a combo, I added some royal blue to cool it down.

DSC03759 All the stamped images are embossed with clear EP.

  • Stamps: PTI Guidelines Two, Inkadinkado Borders
  • CS and PP: Bazzill and DCWV
  • Versacolor inks, clear EP, grosgrain ribbon, fiskars lace corner punch, nestabilities.

September 17, 2009

SC06 – SCS sketch challenge

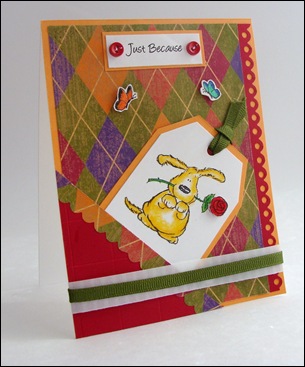
For those familiar with SCS would notice that this challenge is prefixed SC and not SCS, can you imagine how old this challenge must be? :) This sketch was really a challenge for me and I loved it!

DSC03722

  • Stamp: Penny black
  • PP and CS: DCWV and Bazzill
  • Prismacolor pencils, buttons, grosgrain ribbon, vellum, crop-a-dile, scallop scissors.

September 13, 2009

Partial Embossing using cuttlebug – a tutorial

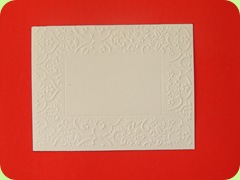
I saw this card and wanted to make a card with a similar embossed border. Presently there is no existing die that I could use as it is. So I started scouring the internet to see if anyone had done this. To my dismay none had. However, looking at various other things that people had done with their cuttlebug embossing folders, I got an idea about how I could achieve this look. So I got working and lo and behold! The results were fantastic – I got the look I wanted! Here’s the card I made:
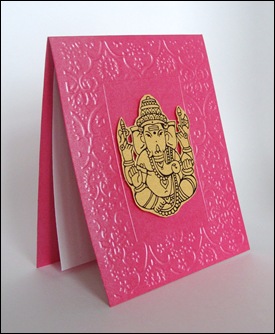
DSC03692

The center image is printed on gold shimmer cardstock and the base is also shimmer cardstock – don’t you simply love it?!?!? I do!!!!

Ok, here’s the tutorial.

What you need:

  • Some cardboard pieces – I cut them out of cereal boxes.
  • cutting knife/blade
  • Die-cut machine and its paraphernalia
  • Embossing folder of your choice

Steps:

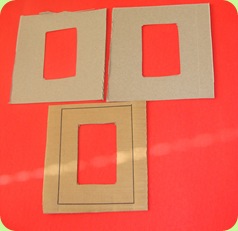
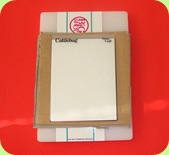
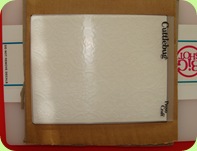
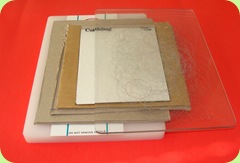
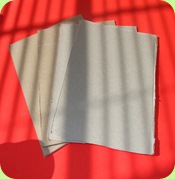
  1. Take 3 pieces of cardboard. The number of pieces will vary depending on the thickness of your cardboard. I’m using cardboard from cereal boxes so that should give you some idea. The size of each piece should be a little bigger than the embossing folder that you’re using. Other than that the dimensions are not so important. In the second photo is a side-by-side comparison of the size of the cardboard piece with the acrylic plate of my big shot.
  2. DSC03729 DSC03730
  3. Draw the outline of a front of an A2 card on one of the pieces. This means draw a rectangle of 4.25 X 5.5 inches on the cardboard such that the longer side of the outline aligns with the longer side of the cardboard. I use a piece of cardstock to draw the outline.
  4. DSC03731 DSC03732
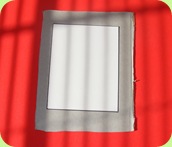
  5. Cut a window in the center of this outline. This is the area that you do NOT want to emboss. Using this window as a guide, cut a window in the other two pieces too.DSC03733
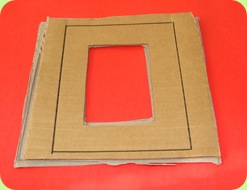
  6. Glue all three pieces together – aligning the windows.DSC03734
  7. Now assemble the sandwich.
  8. DSC03738
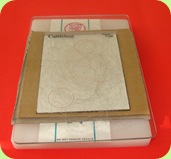
    Multipurpose platform, with the cardboard thing we created in the step above, followed by the embossing folder with the cardstock inside.
    DSC03739
    Note that the embossing folder is placed such that the cardstock aligns with the outline that we drew in step 2.
    DSC03740 Acrylic plate on the top  
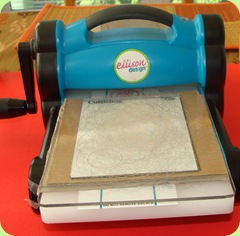
  9. Now roll the sandwich through your die cutting machine.DSC03741
  10. Check the cardstock to see if the embossing was to your liking. I found that the embossing was lighter than I expected. DSC03742
  11. So I added a shim (another cardboard piece – it doesn’t need to have a window or anything). You can also use some cardstock pieces. So my new sandwich is: multipurpose platform, piece of cardboard, the glued cardboards, embossing folder, acrylic plate.DSC03743
  12. Roll it again through the die-cut machine.DSC03744
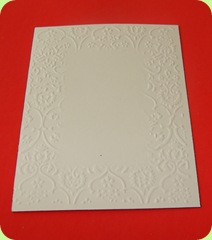
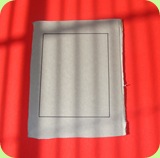
  13. If you want the frame look on the inner rectangle, just score lines there. I used my scoring blade to do it. If you don’t have one you could use a ball-point pen that’s NOT working.DSC03746 And you’re done!

September 9, 2009

Penny black parade

I’m trying to devote one week to one stamp set so that I ink as many stamps as possible. Let me tell its very hard – the feeling that you’ve to stick to just one stamp set in one week!! I’m trying…:)

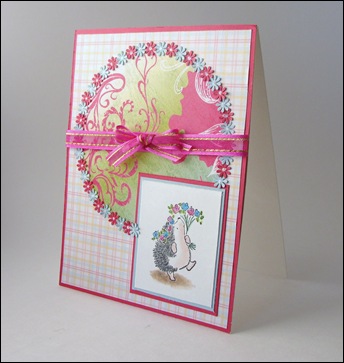
So here’s another hedgie from Penny Black for 2S4Y challenge. I made the border of the circle using the tiny flower punch and added a white dot topped with stickles to the flower centers. I think that was the most time taking part of the card! LOL!

DSC03706

  • Stamps: Penny black
  • CS and PP: DCWV and Bazzill
  • Prismacolor pencils, OMS, flower punch, ribbon, stickles.

September 7, 2009

caardvarks challenge

Caardvarks has some lovely sketches for their challenge! If you haven’t seen them check them out at caardvarks challenge.

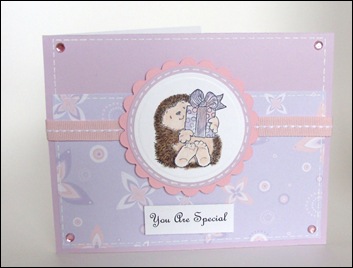
This is what I made for their challenge, its based on sketch #1. I popped the feet, the scallop circle and the sentiment on dimensionals and the gift is paper pierced.

DSC03690Hmm…looks like I’m going for the soft look these days!

  • Stamps: Penny black
  • PP and CS: DCWV and Bazzill
  • Prismacolor pencils, ribbon, white gel pen, rhinestones, pop dots.

September 6, 2009

Angels and Fairies; and CPS 131

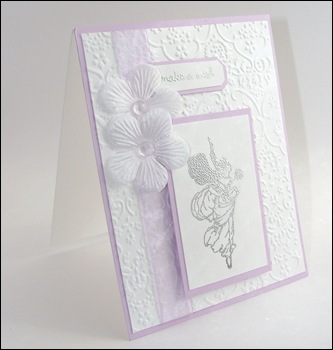
This stamp is extra special to me as it was given by my DF – a non-stamping DF at that. I’d been looking for a way to use it: it seemed too fine for my coloring skills and embossing seemed to be the perfect way. I also want to try paper piercing with it. It looks awesome when embossed as you can see in the card below. So this is my entry to the PWC “Angels and Fairies” and CPS 131.

It was after such a long time after which I was using a rubber stamp as opposed to a clear stamp. It sure felt good!

DSC03675

  • Stamps: Dunno as its a gift
  • PP and CS: Bazzill and Wasau
  • Silver EP, Sheer ribbon, flowers, dew drops.

September 3, 2009

Kazan’s sketch 34

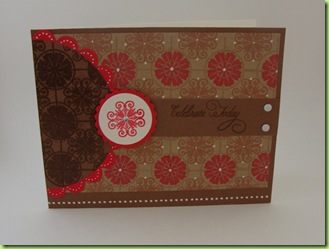
My affair with Guidelines two continues. I’ve liked almost all the cards I’ve made with it but I’m still waiting for my “Aha!” moment :). Somehow I’ve been unable to beat my imagination. Anyways…this card is based on Kazan’s sketch 34. I wish the red ink in the background would’ve been brighter and the brown, a deeper shade like chocolate brown. That was my imagination. This is my creation; but in the end I like it though its not exactly the image I’d started with.

DSC03656 The sentiment is clear embossed and so is the pattern on the semi-circle as well as the focal image. There’s a tiny rhinestone on the focal image adding that elegant touch.

  • Stamps: PTI Guidelines two, Flourishes Flourished words
  • CS: DCWV and Bazzill
  • Nestabilities, brads, clear EP, rhinestone, white gel pen.