July 28, 2012

Little Black card

When I saw this card, I was reminded of the Little Black Dress and I HAD to make this card! I didn’t have the same stamp (it looks beautiful and I was tempted to buy it) but having recently taken the Stretch Your Stamps class I was all about stretching my stamps. So I picked the best replacement I’d and I think it turned out just like I thought it would!

DSC09983

I clear embossed the background on a black CS panel and adhered it to the card base. Clear embossed the label and cut it out; also cut out a window in the label. Stamped the sentiment in black on Aqua CS and adhered it at the back of the window.

  • Stamps: Cover-a-card Damask, Hero Arts Frames and Messages
  • PTI black and aqua
  • Versamark ink, clear embossing powder, memento black ink.

July 20, 2012

Stretch Your Stamps–Sentiment stamps (day 5)

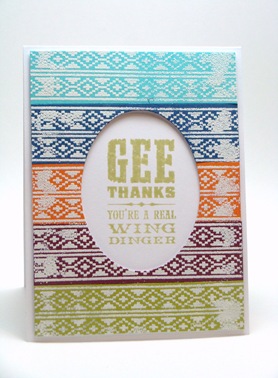
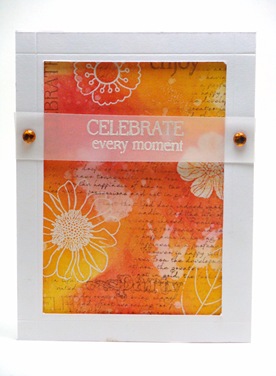
What would you do if your card turned out just what you’d in mind? And it was one layer? And it took only 15-20 minutes? I know – do a happy dance!!

DSC09971

  • Stamps: Waltzingmouse Say it Loud, Technique tuesday silhouette
  • Paper: PTI white
  • Distress inks – fired brick, tumbled glass, Peeled paint, rhinestones, corner chomper

July 19, 2012

Stretch Your Stamps–Border Stamps (day 10)

I don’t know if I can classify this as a truly border stamp but this is the closest I had to a border stamp. Once again I used the color block technique – it’s a great way to use up your scraps!

I was inspired by a cowboy poncho for this design. For some reason the embossing didn’t come out perfect but I think that resulted into a nice worn/distressed look!

DSC09970

  • Stamps: Waltzingmouse Back in the saddle and Way out West
  • Paper: PTI white and others
  • White EP, Versamark, Distress Ink Shabby Shutters, oval nestabilities, heating tool

July 18, 2012

Stretch Your stamps–outline stamps (day 9)

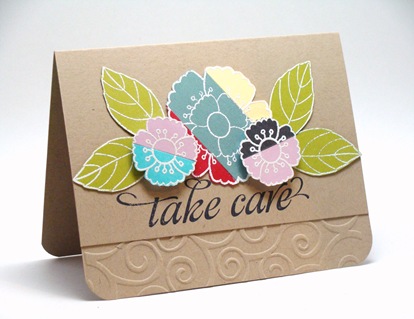
I white embossed the flowers on a color block pattern paper that I created. Also white embossed the leaves.

Once again it’s the blossom art stamps – seems like it’s hard to make a card without them!

DSC09966

  • Stamps: Hero Arts Blossom Art, Waltzingmouse Say It Loud
  • paper: PTI kraft and others
  • Cuttlebug Swirl embossing folder

Stretch Your stamps–Label stamps (day 8)

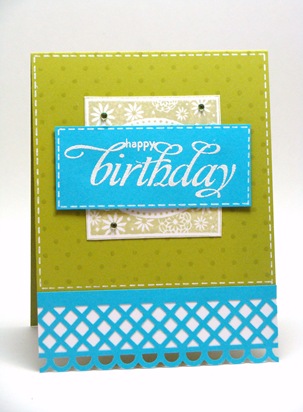
The trick here – the label that you’re seeing at the back of the sentiment is actually cut into half. Since it was too small for the sentiment I “stretched” it by cutting it in half and accordingly adhering it behind the sentiment.

DSC09967

Stamped polka dot on the CS in Shabby Shutters. Stamped the label in Shabby Shutters. Cut it in half. Embossed the sentiment in white. Added the faux stitching using white gel pen. Adhered the two-pieced label and then the sentiment. Punched the border and added a white background. Added faux stitching border to the card.

  • Stamps: Hero Arts Frames and messages, Waltzingmouse Say It Loud
  • Paper: PTI green and white, TPC blue
  • Martha Stewart Lattice punch, white embossing powder, Sakura white gel pen, distress ink, rhinestones.

Stretch Your Stamps – Floral stamps ( day 7)

Yes I’m missing Day 5 & 6 – yet to catch up with samples for those classes.

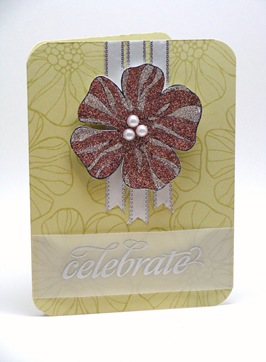
For once I can say that I’d some stamps in the category of the day and what better floral stamps than Blossom Art! I didn’t have microfine glitter but I really liked the technique of stamping on glitter so I did the reverse. I stamped and then added glitter to the image. The most important thing I learnt was to seal the glitter – I did that using glossy accents. What you need to do it rub glossy accents all over the glittered image with your finger.

The center of the flower seemed to be getting lost in the glitter so I wanted to bring attention to it. First I picked some rhinestones but the glitter was too overpowering. So I figured that I needed to soften it down and pearls seemed to do the job.

DSC09969

Stamped the image in Shabby Shutters on the CS. Stamped the image in black on white CS. Filled the area with quickie glue pen and then added glitter to it. I did one color and one petal at a time. Also somehow putting glitter on the image doesn’t work as well with me as putting the image to glitter. So I sprinkle some glitter on my non-stick craft mat and then after adding glue to the image, press down the image on the glitter. Added ribbon. Embossed the sentiment in silver on vellum.

  • Stamps: Hero Art Blossom Art, Waltzingmouse Say it loud
  • Memento black ink, Distress ink, Martha Stewart Glitter – bronze and silver, silver embossing powder, adhesive pearls, ribbon.

July 13, 2012

Summer mean orange

Yes I’ve been going crazy with my distress inks – I think they’re worth the investment! This was a white CS and I turned it into orange! Magic! Of course the CS did get a little warped in the process. If you look at the card closely you’ll find a self-print on the orange.

DSC09888

Stamped the flower in versamark all over white CS. Tried to emboss with white EP but it wouldn’t stick. Don’t know why!! Nevertheless went onto the next step – applied the distress ink pad directly to CS and colored it orange. Cut a strip of white CS. Stamped the flower in orange on it. Colored a rhinestone using a sharpie and embellished the flower. Stamped the sentiment in black and the little dots are from out on a limb set. They’re actually supposed to be berries.

  • Stamps: Hero Arts Blossom Art, PTI Out on a limb, studio g sentiment
  • Paper: PTI white
  • Others: Spicy Marmalade distress ink, rhinestone, brilliance black.

July 12, 2012

Stretch Your Stamps– Graphic stamps (Day 4)

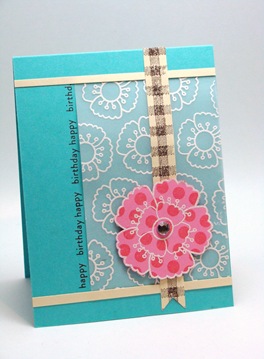
Once again I didn’t have any graphic stamps so I picked the one that was closest to the definition of a graphic stamp – one with clean lines.

DSC09890

Wow can’t believe this is the third card I’m using vellum on! The gingham and polka dots were done using background stamps. White embossed the flowers on the vellum. Cut two fine strips from cream CS and adhered it (to basically hide the vellum adhesive).

  • Stamps: Hero Arts Blossom Art (my fave!), WMS Say it Loud(I just got it 2 days back and have already used it on 3 cards!), Impression obsession gingham and CHF polka dots
  • Paper: PTI aqua, vellum, TPC cream and pink
  • White EP, rhinestone, memento black, distress ink worn lipstick and walnut stain.

Stretch Your Stamps – Letter Stamps (day 3)

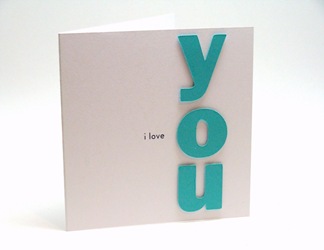
Since I didn’t have any letter stamps I thought I would substitute it with die cut letters. I cut the letters using SCAL and Cricut. The font is (I think) Frank Gothic heavy.

Absolutely love the cleeeeeeean look of these cards!

DSC09891

DSC09892

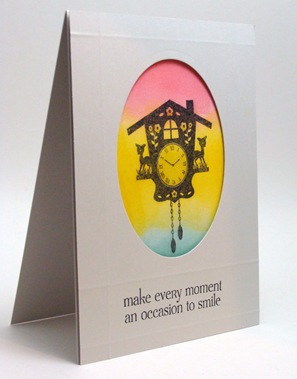
Multicolor cuckoo

DSC09887

Stamped the cuckoo in Brilliance black and tries to emboss with clear EP. Didn’t help a lot. Sponged with distress inks. Cut an oval in sandstone CS, scored a frame around it and stamped the sentiment in memento black. Popped the panel on pop dots.

  • Stamps: hero Arts Cuckoo
  • Paper: PTI Sandstone and white
  • Others: Distress inks – worn lipstick, mustard seed and broken china, brilliance black, memento black, nestabilities oval die.

July 11, 2012

Background stamps

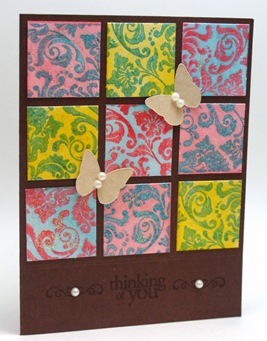
After I made the patterned paper using my background stamps here, the first card I made was this:

DSC09886

The butterflies were cut at 1” using SCAL and Cricut.

  • Stamps: Impression Obsession Damask cover-a-card, Hero Arts Frames and messages
  • Paper: PTI and The paper company.
  • others: Distress inks – broken china, mustard seed, walnut stain and worn lipstick, adhesive pearls, Crystal stickles.

July 10, 2012

Strech Your Stamps – Collage Stamps (day 2)

Collage stamps intimidate me and hence I’ve none in my stash. So I imitated the look with the stamps I had and I must say that the class is not just stretching my stamps it’s also stretching my creativity! This kind of a card would totally be out of my comfort zone if it were not for the class.

DSC09889

Stamped and embossed the flowers with clear EP. To give the flowers a little distressed look I brushed off some EP before heating it up. Sponged all over the CS with distress inks. Splashed some water on top of it and wiped it off to get those blotches. Did second generation stamping with text background stamp using Walnut Stain; I also removed ink from areas on the background stamp where I knew it would overlap with the flowers. Randomly stamped some sentiments – second and third generation stamping. I used second generation stamping so that the background is subdued. Adhered the SC to the card base. I cut a panel using craft fine and scored a frame around it. Popped it on top of the card. White embossed the sentiment on vellum. Wow – I’ve never used vellum consecutively on two of my cards! So I’m happy that the class is making me use all my supplies!

Color Combination

ds-barndoor  ds-spicedmarmalade  mustardseed

  • Stamps: Hero Arts Blossom Art, WMS Text-it, Hero Arts Frames and messages & Hero Arts Cuckoo (for sentiments)
  • Paper: PTI white, vellum
  • Others: Distress inks – mustard seed, spiced marmalade, barn door, walnut stain; rhinestones, clear EP.

July 9, 2012

Stretch Your Stamps – Day 1

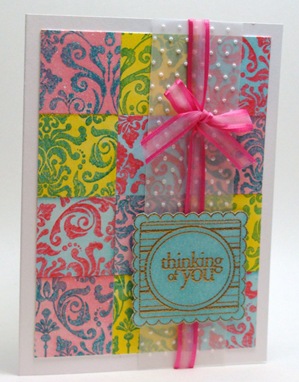
I enrolled in the the Stretch Your Stamps online class and today was the first day of the class. It focused on background stamps which was really good for me because just yesterday I’d made some patterned paper using my background stamps and wondering what to do with them!

Here’s my sample for today:

DSC09885

Can  you believe that the only CS I used in making this card was a white CS?!?!? I created the patterned papers by stamping the background stamp in distress ink, embossing it with clear embossing powder and then sponging all over with a contrasting distress ink. I cut a strip of vellum and embossed it with swiss dots embossing folder. The sentiment was stamped with versamark on white CS, embossed with gold embossing powder and then sponged over with Broken China distress ink.

I intend to make a masculine (or unisex) version too using the same technique! Watch out for that!

  • Stamps: Impression Obsession Damask cover-a-card, Hero Arts Frames and messages
  • Paper: PTI white
  • others: Distress inks – broken china, mustard seed and worn lipstick, ribbon, vellum, swiss dots embossing folder, gold embossing powder.