March 30, 2011

From Ugly Betty to Bold and beautiful

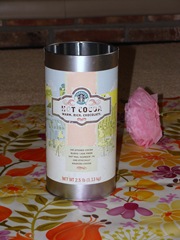
I’d been waiting for this Starbucks Cocoa tin to get empty so that I could put it to some good use Winking smileEvery time I got some cocoa from it, I would think to myself – “oh what a beautiful candidate this is for altering!”. One day I was lucky enough and the last grains of cocoa were used up from that tin by some Samaritan (in all probabilities it was me) and then a jubilant me put it in the dishwasher to get it ready for the d-day!

I figured that the tall and thin structure of the tin would make a beautiful vase. If there’s a vase, there need to be flowers. I’m not one who can dutifully pick the flowers from the garden and replenish the vase everyday. So artificial it was, for me. Handmade? Or readymade? no handmade would be better. But ready made would look more natural. The tussle began and handmade won the war. Thus began the search for tutorials for handmade flowers. Lucky for me I’d been recently experimenting with some paper flowers and had hit upon just the right tut. Here it is. The only thing that I would like to add is that alternately opening the layers from opposite sides worked better for me than opening all on one side and then the other.

So here’s a peek at the tin that was

DSC06098

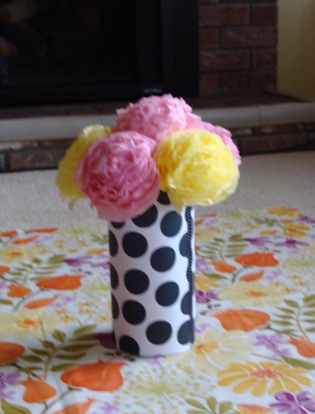
and what it is now

DSC06099

Doesn’t it look perfect for spring?!?!

I used a 12X12 scrapbook paper to cover the tin. It fell a little short – so I made two pieces of it. 6 X 12 each. Covered up the little slit on both sides with a black and white ribbon! Nobody would ever know that I did that because I was short of paper!! If you look closely at the photo you can see the ribbon on the right side. My apologies for the blurry photo – I didn’t realize it then.

The flowers are made from tissue paper. Since it’s spring I wanted a pastel theme. Don’t they look gorgeous?!?!?

This masterpiece now sits on our dining table. Not only did I save a tin from going to the landfill but also created a beautiful centerpiece at no cost!!
March 28, 2011

Baby Banner

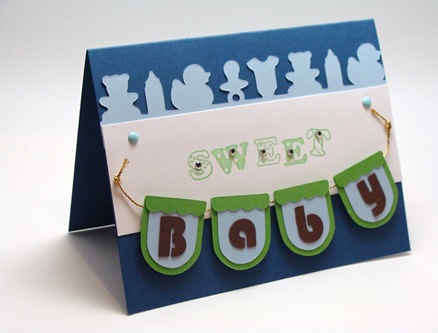
Lots of babies are due among friends and family so I decided to create a stash for myself. I got the color theme for a baby bedding collection – sorry I don’t have the link. This is one of the cards which was created “on-the-way”. Most of the time, I already have in mind the picture of the card that I want to create. That was not true here. I knew I wanted this color scheme. I wanted to have a banner. And that’s all. So I added elements as I thought of them.


DSC06082


The baby border, banner and banner elements were all cut using cricut. I created the baby border using the baby images provided with SCAL. The banner is popped up on dimensionals and the sentiment is from Inkadinkado clear stamp.


You can download the baby border SCUT2 file here. The file is for personal use only. Please do not sell the file.


  • Paper: PTI Enchanted evening, New Leaf, Dark Chocolate and white

  • Stamps: Inkadinkado Baby Animal Clear stamps

  • Others": Versacolor ink, golden cord, brads, rhinestones, cricut, SCAL.

March 16, 2011

A few more lamp cards

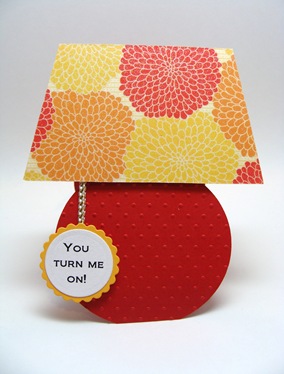
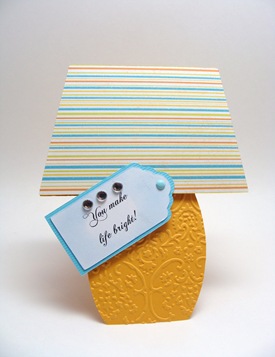
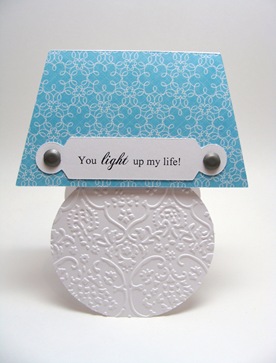
You can see my first lamp card here. It has most  of the instructions on how I made these cards.

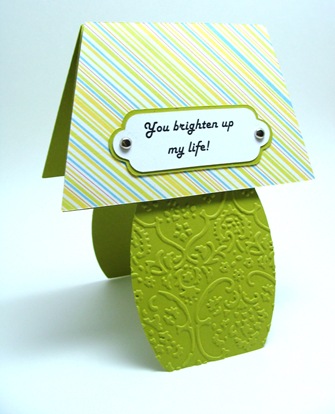
I made the template as an SVG file in Inkscape and then cut it using Cricut and SCAL. Then embossed the bottom half of the lamp using cuttlebug folders and big shot. Attached the lampshade using foam dots.

DSC06071

DSC06074

DSC06077

All sentiments are printed on computer.

  • Paper: PTI CS and DCWV Citrus PP

March 10, 2011

Tuesday Trigger and the journey of a card

I’ve been itching to make a card since I saw this week’s Tuesday Trigger. Especially the colors and the flower – they spoke to me. They were literally begging me to make a card based on them. So how could I disappoint them?!?!

Hence began the journey of a card.

Stop 1: I must make a tissue paper flower – that would look so lovely. An orange one. Oh no!! I don’t have orange tissue paper. Who used all of it?!?!

Stop 2: Never mind. Forget the trigger colors, I’ll make-do with pastel yellow. Flower done. Looks smaller and not as fluffy as it should be.

Stop 3: Make another flower. This time bigger and fluffier. Oops! This is too fluffy for a card – good for home décor but not for a card.

Stop 4: Think, think, think. Ah! The final destination has arrived. Use scallop circle nestabilities to make a flower.

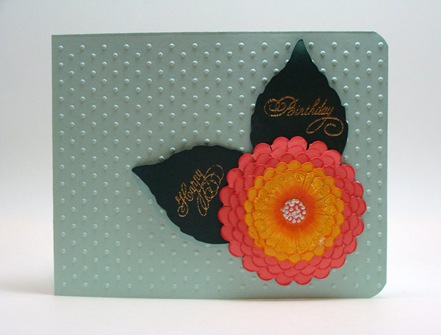
Hence was born the flower on this card.

DSC06085

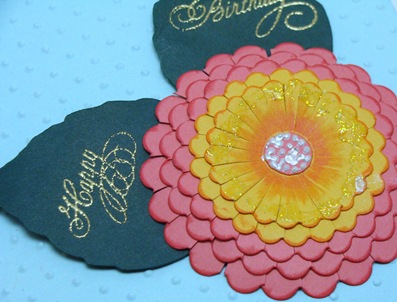
I cut the layers of the flower using scallop circle nestabilities. Inked the edges using Versacolor inks. Cut the petals.Then curled the petals using a pencil. Glued all the layer together, at the center. Then cut a small circle for the center. Dotted it with liquid pearls (big mistake! always do this step after your card is finished!). Cut the leaves using Cricut at 2.5 inches height. Embossed the sentiment with gold embossing powder. Embossed the card using swiss dots embossing folder. Glued the flower and then the leaves to the card. Popped up the ends of the leaves on foam dots. Dressed the petals with Diamond stickles.

A closer view.

DSC06083

  • Stamps: Flourishes Flourished Words
  • Paper: PTI Berry Sorbet, Pine Feather, Aqua Mist, Summer Sunrise
  • Others: Cricut, SCAL, Liquid pearls, Stickles Diamond, Gold embossing powder.

March 4, 2011

Lamp card

I’d had this design in my mind for a long time and was very pleased to see it executed Smile

DSC06068

All the CS – the lampshade, lamp card and tag - was cut using Cricut, SCAL and an SVG file I created. So was the lampshade. The card was cut at 10.5 inches in height which resulted in a card approx 5.25” in height and 4” in width. The inner tag was cut at 2.5” in width. I found that for the outer tag I’d to remove the “Keep proportions” options to give a uniform border. The base of the lamp was then embossed using Textiles folder. The sentiment was printed using the computer. I first printed the sentiment on a copier paper and then taped the tag on top of it using a double-sided tape so that the sentiment would print at the correct position. That worked like a charm!! It saved me so much trouble!

  • Paper: PTI Simply Chartreuse, White and DCWV DP
  • Others: Cricut, SCAL, Brads, Cuttlebug Textiles embossing folder.

March 2, 2011

Baby Girl

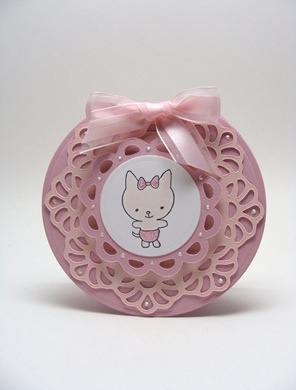
Our friends recently had a baby girl and I made this card for  them. I absolutely adore the card!! It’s just what I wanted it to be – soft like a baby!

DSC06066

The circle card is cut using the largest nestabilities circle die. I’d to go over 3-4 times in the cutting machine before the die cut through the two layers of PTI CS. I think next time I’m going to try using my cricut. The outer doily was cut using Sweet Blush CS and inner one using Lavender Moon. The stamp is from Inkadinkado. I added liquid pearls to the doilies and stickles to the diaper and the bow.

  • Paper: PTI Sweet Blush, Lavender Moon, White
  • Stamp: Inkadinkado clear stamps
  • Others: Cricut, Liquid Pearls, Diamond stickles, Ribbon from Michaels.