The numbers are cut using Silhouette Portrait. The stars are from a Lawn fawn stamp set and the hippo is from MFT Happy hippos stamp set. Colored using copics. Added glitter using Wink of Stella pen.
I made this background as one of my first projects with Portrait 2. It looks much better IRL! Colored the hippo and hearts with copics and then added stickles to the hearts. Popped them up on foam stickers. Pretty simple!
Supplies: DCWV Glitzy stack, MFT Happy Hippos stamp set, Copics, Portrait 2, Stickles

 ! Here’s another one. I love the simple look of this card! Cut the sentiment using Portrait as well. The stamp is colored with copics and then added some shimmer using Wink of Stella on the balloons and the bow. A closer look at the shimmer here:
If you would like to know how to make these pop up box cards without using a die refer to my previous post. They are really easy to make and look so cute!!
For this one, I changed the dimensions a little bit. In the previous post, the box flaps and the box sides are the same dimensions 2” X 2.5”. In this I changed the box flap to 1.5” X 2.5” and the box sides are 2.5” X 2.5”. I think I liked the original dimensions better – although this looks good as well.
I used a strip of acetate cardstock to attach the bee so that it looks like it’s hovering above the grass. I colored the images using copics as well as prismacolor pencils. The grass die cut I had cut using my zing sometime back.
A closer look:
Supplies: Lawn Fawn Gnome Sweet Gnome, Copics, Prismacolor pencils, KNK Zing, acetate cardstock, Papertrey ink cardstock.
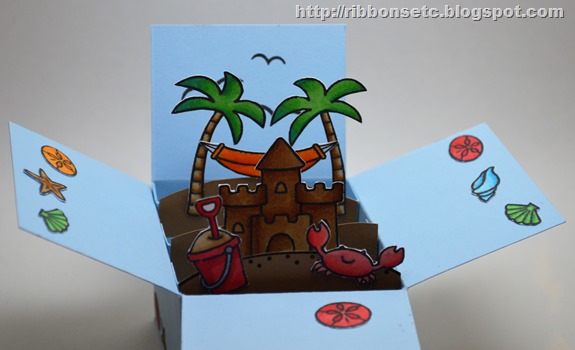
You must have seen pop-up box cards popping up (pun intended!) all over the internet! They look so adorable that I wanted to try some out! The good thing about these is that they’re pretty flat – of course not as flat as a single or double layer card but still not bad. Plus they don’t need additional equipment. Yes there are dies in the market for these but you can make them just using your paper trimmer!
Here are some more views
and more
Here’s what you need to make these:
Instructions:
Supplies: Lawn fawn Life is good stamp set, Copics, Papertrey Ink cardstock.
Another Art Impressions stamp colored with copics. Stamped the background using various sentiments.
Supplies: Art Impressions stamps, Copic markers, Versafine black ink, Papertrey ink cardstock, Smooth bristol board paper.
The sentiment on these little notecards is foiled with the minc machine. I first printed it on paper using my laser printer on neenah solar white cardstock. Then used gold foil to foil it using minc. The images were stamped separately, colored with copics, fuzzy cut and then adhered to the main panel.
Here’s a closer look at the foiling:
Yet another digital stamp.Colored it using copics. Don’t remember the embossing folder that I used here 
Another digital stamp that I found for free. Colored it using copics. For the outer panel, I sponged distress inks, die cut a circle using nestabilities and then gave a snow like effect using my white gel pen. The sentiment is embossed using white embossing powder.
When I get these shopping bags from different stores, it really hurts me to just throw them away. They are so well constructed that they deserve a second life. On those lines I thought that it would be nice if I could alter them into gift bags! This is not my first attempt. I’ve done some in the past too. This was a shopping bag from Gap, I hid the logo using this card panel. The card panel was created by stamping the basic grey’s background stamp and then coloring it with copics. The border was created using double sided tape and gold foil.
I’m always in the mood of making backgrounds especially by doing some sponging. So during one such moment I created this ombre background by embossing the background stamp in silver and then sponging on top of it. Once I’d the background I wasn’t sure what to do. Then I realized that it would make for a nice whimsical space scene! Hence was born my card!
The images are colored in copics. This is the first shaker card I’ve created. I used foam tape to create the cavity and added some martha stewart glitter (which I’ve plenty of!) to it.
Pleased with my idea
Oh when this stamp set was released and I saw the samples I was drooling over it! So when I got the first chance to buy a stamp set purchased this and you know what? Every time I wanted to make a card using this set, I would be totally stumped. Just didn’t know what to do with it. Finally a few months later I resolved that I must use this set and I’m glad that I did. For I really like this card!
I sponged the base cardstock with tumbled glass. On a separate piece of cardstock I stamped the castle. Then I masked the castle and stamped the dunes. Colored the castle and the dunes. Cut it out and glued it to the base. The pail, flip flops and shells were acolored, cut out and then glued. The sentiment is printed on the cardstock. I wanted to make a birthday card using this set but none of the sentiments in the set were what I was looking for so I made my own. The castle and the dunes are sponged using distress inks – since I didn’t have copics in this color. The rest are colored in copic. Added some stickles to the castle.