May 30, 2011

Simply Sketches #2

Here I am with the second round of Simply Sketches!

SimplySketch2

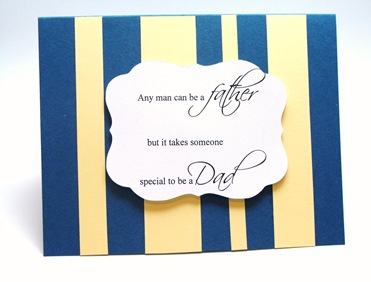
For my sample I wanted this thick and thin stripes, I don’t know if there’s an official word for it. They’re so popular these days, I saw them on some outdoor cushions on the pottery barn website and several other places. To me they looked perfect for a masculine card!

DSC06342

I cut 4 stripes from Lemon Tart with width – 1”, 3/4”, 1/2” and 1/4”. Then glued them to the Enchanted Evening base. The good thing about this pattern is that you can place them randomly – no measurements required. I cut a frame from white CS using Cricut and SCAL. Printed the sentiment on it using computer and adhered it using foam dots. The printing didn’t come out really perfect.

You can download the SVG file for the frame here. As usual, do not sell the file.

  • Paper: Papertrey Enchanted Evening, Lemon Tart, White
  • Others: Cricut and SCAL.

May 25, 2011

Tuesday Trigger

I absolutely loved this week’s tuesday trigger and couldn’t wait to make my card.

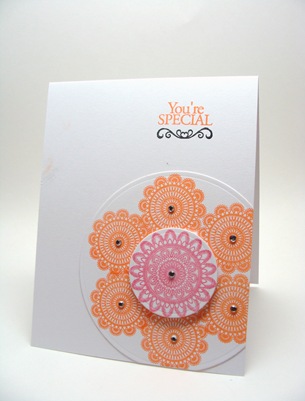
A few days back I tried to make a card with yellow and orange as the color combo but somehow it didn’t go where I wanted it to. I left it half way through. So I was adamant about completing today’s card. It took me around 2 hours to make this card – 1 hour and 50 minutes to design the card and 10 minutes to make it!! I’d a really hard figuring out how to create a big doily using the small ones. After several failed configurations before I found this one that fit the bill! I wish a better red ink Sad smile. The sketch is based on Simply Sketches #1.

DSC06340

I stamped a small doily in orange – this would be the center of my doily. Then stamped the other orange doilies around it. My first attempt – which was directly on the card base was ruined – so I cut out a circle and glued it on top of the ruined stamping Smile Stamped a bigger doily in red on white CS and die cut it using circle nestabilities. Adhered it to the center of the bigger doily using foam dots. Glued rhinestones to the center of all doilies. Stamped the sentiment in orange and the accent in black.

  • Stamps: Maya Road Doilies stamps, Hero Arts Frames and Messages (sentiment and accent)
  • Paper: Papertrey White
  • Others: Versacolor orange, camellia, rhinestones, Brilliance black

May 23, 2011

Introducing Simply Sketches – Simply Sketches #1

I loved the sketches from WMS sketch challenges – they were so simple. Hence so conducive for CAS as well as non-CAS cards. However recently they changed their policy such that a challenge entry must have at least one WMS image. Unfortunately for me I don’t own any WMS stamps Sad smile. I do love them but I haven’t gotten down to that part of my wish list yet. Thus I could no longer participate in them. Since there seemed to be no other sketch challenge which had simple sketches I decided to create my own sketches.

I thought that there might be others who were in the same boat as I am and could benefit from these sketches. So I would post every sketch I create along with my sample. The sketch would be posted every Monday. Let’s hope I can follow that schedule Smile If you were inspired by my sketch and created a card I would love to see it. So please do leave me a comment with a link to your card. Your card doesn’t have to be CAS. You can use the same sketch in various ways:

  1. Rotate the sketch.
  2. Take it’s mirror image.
  3. Stretch or shrink it’s elements. Try not to do that to an extent that the basic layout of the sketch is lost.
  4. Any other way you can think of.

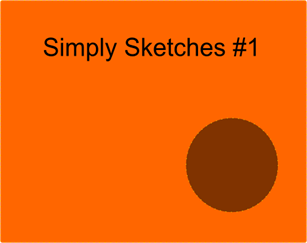
Here’s the first sketch and my sample:

SimplySketch1

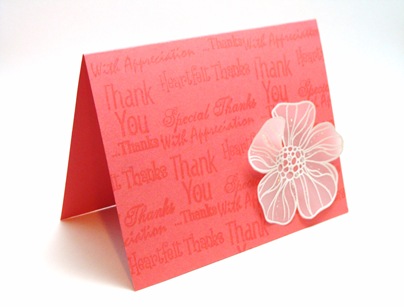
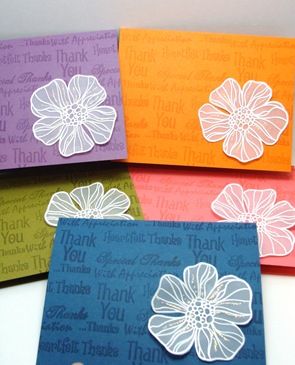
I made a set of thank you cards using this sketch. This is also my entry to Hero Arts Fabulous Flowers contest.

DSC06336

DSC06339

I stamped the flower in versamark on vellum. Then embossed it in white embossing powder. Added some Diamond stickles to the petals and dotted the center with liquid pearls. The background was created by taking together some thank you sentiments and stamping them repeatedly using Versamark.

  • Stamps: Hero Arts Blossom Art, Inkadinkado Thanks
  • Paper: Papertrey Enchanted Evening, Berry Sorbet, Plum Pudding, Ripe Avocado, Orange zest
  • Others: Vellum, white embossing powder, Diamond stickles, Liquid pearls.

May 19, 2011

Cricut and SCAL–overview, review and every other view

ETA: Here's a review of the top 10 electronic cutters for 20

So long time back I posted that I’d received Cricut as a gift. Since then I’ve been saying that I would post a review of it; but there are always so many projects to show that it would get sidelined. Then recently a blogger asked me if I’d any opinion on the different electronic cutters. That’s when I realized that I’d totally forgot to share my experience. So here it is.
Let me first start with my story. If you want to skip the details and explanations then go to the next paragraph Smile.
Honestly when I received Cricut I wasn’t aware of other electronic cutters and especially not that there were others in the same price range. Yes I was that uninformed – I still can’t believe it. I’ve always been one who would research and research about things before buying them. Anyways…I was over the moon when I got the Cricut. Then I realized that I needed cartridges. So I bought 2 that I was drooling over – Christmas Solutions and Tags, Bags, Boxes and More. After buying the cartridges I realized that in terms of the images that I could cut, there was very limited choice since I’d only two cartridges. Frugal that I am, I couldn’t justify buying more cartridges. So I found out about SCAL (Sure Cuts A Lot) software which lets you cut SVG files and other images that you can design in SCAL. That was my last purchase for Cricut, 6 months back. There’s been no looking back since. Now, when I come up with a card design and need a particular image, either I search for it on the internet or design my own using SCAL or Inkscape. Inkscape is a graphics editor which lets you create images that you can save as .svg file (just like you have .jpeg/.gif files) which can then be imported into SCAL. Cricut together with SCAL has let me express my creativity without boundaries. Before I’d either of these, if I thought of a card design most of the times I wouldn’t have a stamp for it. Now I simply create an SVG file and cut out the image using Cricut. A great example of that is this guitar card.
So that was how Cricut, SCAL and I started living in harmony. Trust me we didn’t reach where we’re today without any troubles. There were many a scratches on the mat, torn papers and ruined images before this. So if you encounter these issues just bear with them. There’s a learning curve. Once you cross that, you can live like a happy family!
Cricut uses different settings of the blade and pressure for different CS and these have to be set manually. So I’ve found that it’s best to stick to one kind of CS (at the max two) so that you’re familiar with what settings to use and don’t have to waste your time and energy every time getting the perfect cut. For example I use Papertrey Ink CS and I’ve found that blade=3, pressure=3 and multi-cut=2 works best for this cardstock. Since 95% of the time I use this CS I don’t have to worry about changing the settings nor ruined cuts.
Likes and dislikes:
  1. With Cricut and SCAL together I can practically cut any image that I want. It has opened up a totally new world.
  2. In it’s price segment, I think it’s fairly good. The only other competitor is Silhouette SD but I am not sure whether it can cut chipboard or not.
  3. Cricut doesn’t cut intricate cuts very well – especially in smaller sizes and thick CS.
  4. It needs multi-cut for 110 lb CS (which is what papertrey is) with the regular blade. I haven’t tried the deeper cut blade.
  5. Without the SCAL, you need to buy cartridges for various images. I think even at $30 for each cartridge it’s expensive because I find that I’m only interested in a few images in a cartridge. Not just money, I think it’s a hassle to then store all the cartridges that you own.
  6. Without the SCAL, I find positioning the blade every time a little troublesome. When you use a paper smaller than 12 x 12, then you need to position the blade to the top right corner of the paper so that the machine knows where to start. With SCAL, I just position my paper on the mat to where I put it in the UI of SCAL.
  7. You need a different blade to cut chipboard and such thick materials.
So armed with my experience I now know what I would look for in an electronic cutter if I were to buy another:
  1. No cartridge business. That's only typical of Cricut, others do not have this.
  2. Should support cutting SVG files or some other image format which is widely available. So that you can download images from the internet and cut them. If not then there should be in the box software that lets you create images and has a library of images too.
  3. Preferably universal blade that can cut cardstock as well as chipboard. Both Cricut as well as Silhouette require multi-cuts to cut Papertrey CS.
  4. Should be able to cut intricate cuts. Cricut is not good at that. I've heard Silhouette is.
  5. The lesser the number of accessories the better. I like that Ecraft doesn't need a mat.
  6. The lighter and smaller, the better.
  7. Should be able to connect to a computer.
  8. The accessories are reasonably priced. With cricut I’ve found lot of homemade/economical solutions for prepping the mat. So that helps. My mat had lost stickiness within 2-3 months; but with some Zig glue and baby wipes it was as good as new.
Whoa! I know…that’s an overload of information! I thought it would be nice for somebody who was in the market to buy a new machine to read different experiences. If you have any questions, I would be happy to answer them.
May 17, 2011

Buggys/Baby Carriages

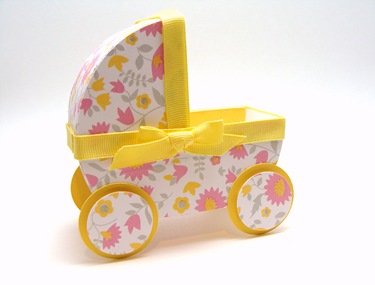
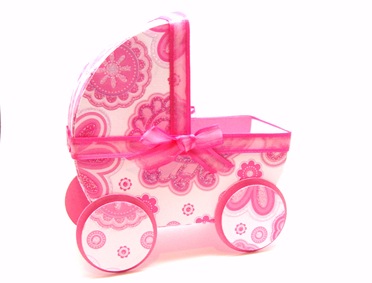
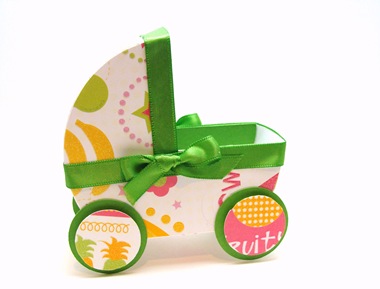
I made these buggys for a friend. If you have a manual die cutting machine then you can get the instructions here. If you have an electronic cutter and SCAL, then you can download the SCUT2 file here. Please do not sell the file.
DSC06317
DSC06318
DSC06319
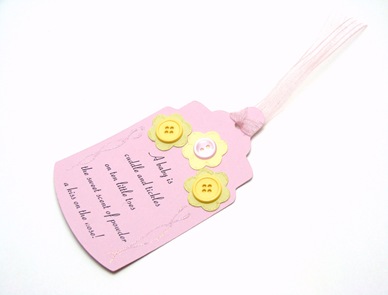
Aren’t they the cutest?!?! I also made her a tag. The picture doesn’t do justice to the tag.
DSC06320
I cut out the bottle shaped tag using SCAL and cricut. The shape comes with SCAL. I cut it at approx. 3 inches wide and 5 inches tall. Then I cut the flowers using SCAL too at 0.75 inches. I printed the poem using the printer. I attached the cut shape to a copier paper and then inserted into the printer. Adhered buttons to flower centers. Punched a hole with crop-a-tile at the top of the tag and then tied a ribbon. Embellished the flowers and the tag with Stickles Diamond stickles – not quite visible in the photo.
  • Paper: Papertrey Harvest Gold, Raspberry Fizz, New leaf, Lavender Moon, Lemon Zest (for flowers), Spring Moss (for flowers), DCWV Sweet Treat (for buggys)
  • Others: Cricut, SCAL, buttons, Stickles Diamond, foam dots, ribbons from Michaels.

May 13, 2011

One Layer card

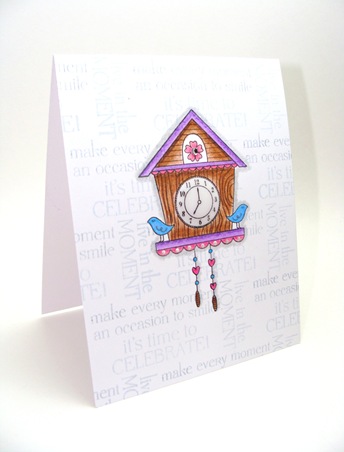
Here’s some more love for the Cuckoo stamp set. I simply loved how this card turned out!!

DSC06312

I stamped the clock on white CS. Then I created a mask for it by stamping it on copier paper and cutting it out. I temporarily glued the mask to the image on the cardstock. Then I started stamping my background. I used three of the sentiments from the set and created a pattern that I liked. Then I repeatedly stamped this pattern all over with Sky Blue ink. Next I colored the image with Prismacolor pencils. I shaded the outline with grey pencil to give it a pop-up effect. Finally I added a rhinestone to the center of the flower, dotted the bottom clock border with liquid pearls and covered the dial as well as the hearts with glossy accents.

  • Stamps: Hero Arts Cuckoo
  • Paper: Papertrey White
  • Others: Brilliance Black ink, Prismacolor pencils, Versacolor Sky Blue ink, Liquid Pearls, Rhinestone, Glossy Accents.

May 4, 2011

Tropical fun

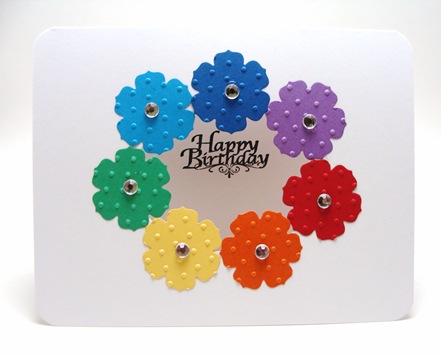
I’d been seeing all these cards with rainbows – rainbow of flowers, butterflies etc. I wanted to try one myself because of their clean and bright look. Somehow mine didn’t turn out what I wanted it to be but I still liked it.

DSC06321

I cut an oval in a white card base using oval nestabilities. Then die-cut flowers in 7 different colors using the PTI beautiful blooms II small die. Embossed the flowers with Swiss Dots embossing folder. Glued them to the boundary of the circle so that they were half inside and half outside the circle. Added rhinestone to the center of each flower. Stamped the sentiment on the inside of the card.

It reminds of the plastic hawaiian leis available in Party City. Smile

  • Stamps: Studio G
  • Paper: PTI and others.
  • Others: Brilliance ink, rhinestone, nestabilities, swiss dots embossing folder.