August 26, 2016

Amigurumi bunny

28367817024_7045c78800_o

So I’ve been dabbling a little but into crochet these days. What I like about crochet as compared to sewing and papercrafting is that all I  need is a needle and yarn and I can do it anywhere, anytime! There are many times when I’m too tired to sit at a table and sew, or gather my papercrafting supplies and then I just pick my needle and yarn to crochet peacefully.

I found this bunny pattern on Happy Berry’s site. It was so much fun to make this! I still need to get better at sewing the limbs together and placing them right. The way it is right now, it can’t sit on it’s own. It needs some support. This was my first pattern where I switched colors mid-way. That was a good learning experience. I don’t have the safety eyes nor do I like the stitched eyes. Instead I use the googly eyes – which I’ve a lot of! I used a medium weight size 4 yarn with a 3.5mm crochet needle.

August 1, 2016

40th Birthday

knk zing, minc, foil, 40th birthday

The inspiration for the background came from here. I wanted to recreate the background. So I created a polka dot SVG in MTC and cut it out in blue using KNK Zing. Then added a layer of red to bottom. Using a white gel pen, I added some dots around the circles. The sentiment happy is hand cut and hand written; then adhered on a twine. 40th was first cut using KNK Zing then covered in glue using Zig glue pen and foiled with the Minc. Love how it turned out! The sentiment “birthday” is from a Stampendous stamp set.

  • Stamps: Stampendous birthday wishes
  • KNK zing, Minc, gold foil, white gel pen, Recollections paper

May 6, 2016

My first amigurumi – Octopus

octopus,amigurumi,pink,crochet,yarn,googly eyes

Whenever I see somebody knitting I feel very jealous of them. All they need is needles and yarn and they can get started – anywhere. In a flight. On the airport. Just sitting somewhere. On the other hand, my hobbies not only require a lot of things but also a desk. Be it sewing/quilting or card making. Knitting somehow doesn’t interest me. Nor does crochet so much. However when I saw the cute little amigurumi creations on the interwebs, I was enticed! They were too cute to pass up! Thus began my venture into crochet. I pretty soon got a crochet hook and yard. Some amigurumi books from the library. Watched a few videos on Youtube and read some blogs. After practicing on little scraps, I decided to make something so that I would get more practice. I picked an octopus from one of the library books (The Big Book of Little Amigurumi) that I got – it seemed to be the simplest. Single color and no complicated body parts. Bought some polyester filling – seems like the smallest pack will last me a lifetime! The eyes and the mouth were supposed to be made from embroidery floss but I didn’t have much success at that so I chose the google eyes and felt – which I already had. Turns out this octopus is very well loved by kids Smile

April 22, 2016

More foiling and more lunchbox notes

Hero Arts blossom art, Lawn fawn life is good

I saw a video where the lady was foiling on transparency and that got me intrigued! I decided that I wanted to try it too. So here I am with foiled sentiments on transparent lunchbox notes. The transparent cardstock is from PTI. I first printed on it using word and my laser printer. Then foiled it using minc. The images were stamped on cardstock, colored with copics and then fuzzy cut. I adhered a white cardstock to the inside of the notecards so that it was easier to write on it and then adhered the colored images.

  • Hero Arts Blossom Art, Lawn Fawn Life is good
  • Copics, Green foil, minc, memento tuxedo black ink

April 15, 2016

Hello Kitty skirt

20160319_004510587_iOS

Another hello kitty item SmileI love making these simple skirts – fabric, thread, elastic and a sewing machine is all you need (and ~2 hours)! This is for a soon-to-be 5 year old and of course a hello kitty fan! All you need for skirts like these is the measure of the waist and length of the skirt. I loved the fabric when I saw it!

April 8, 2016

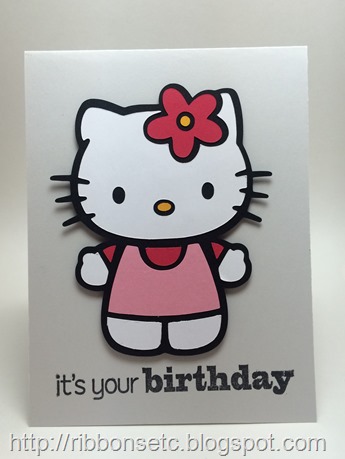
Hello Kitty card

Hero arts, KNK Zing, Hello Kitty

Made this card for my friend’s daughter who’s very fond of hello kitty these days/ I loved how it turned out! Downloaded an SVG for hello kitty from the interwebs and cut it out using my KNK Zing. All the cardstock for cutting out Hello Kitty is Recollection cardstock. The base of the card is Papertrey Ink. The stamp is from Hero Arts.

  • Stamps: Hero Arts Birthday Cling stamp
  • Papertrey Ink Soft stone cardstock, Recollections cardstock.

April 1, 2016

Ribbon trimmed tutu for 1-year old

ribbon trimmed tutu

My niece is going to turn one pretty soon! She looks like a doll and I thought a tutu would be just perfect for her. I love the color purple on her so picked this gorgeous purple tulle and matching ribbon. I followed the tutorial by Just add a bow. Making the tutu was a lot of fun but stitching tulle was not! I’ve not yet figured out what it was – I tried changing my needle, using the IDT (on my pfaff), cleaning the machine, putting a tape underneath the foot – but nothing seemed to work seamlessly. My thread kept breaking. Initially it was every few seconds but after I tried all the above things maybe every few minutes. This happened only when I was sewing the two tulle layers together to form the casing for the elastic. Sewing the ribbon on tulle didn’t give me these problems. If you’ve never stitched tulle before (like me) I would definitely recommend keeping the machine speed slow and maybe practicing on some scraps to see if you’re having any issues.

Other than it was quite enjoyable and done in a few hours. Also loved the finished product! I love how full it is!

ribbon trimmed tutu

I bought the tulle and ribbon from TulleShop. I’d to buy much larger quantities than I really needed but turned out that the price I would pay would be quite less than what I would pay in other stores. So I figured I might as well buy the larger quantities and save the rest for future use.

ribbon trimmed tutu

March 25, 2016

Lunchbox note cards with foiling

20160223_020216816_iOS

The sentiment on these little notecards is foiled with the minc machine. I first printed it on paper using my laser printer on neenah solar white cardstock. Then used gold foil to foil it using minc. The images were stamped separately, colored with copics, fuzzy cut and then adhered to the main panel.

Here’s a closer look at the foiling:

20160223_020238032_iOS

  • Stamps: Technique Tuesday out of this world, Lawn Fawn Admit One, Lawn Fawn Gnome Sweet Gnome, Penny black good catch
  • Copics, gold foil, mini minc, laser printer

March 18, 2016

Another digital stamp

DSC_0008 (2)

Yet another digital stamp.Colored it using copics. Don’t remember the embossing folder that I used here Sad smileLove the clean white look here with a splash of color!

March 11, 2016

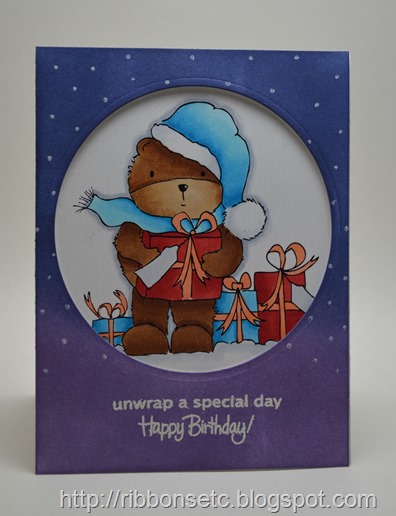
Unwrap a special day

stampendous, free digital stamp, copics

Another digital stamp that I found for free. Colored it using copics. For the outer panel, I sponged distress inks, die cut a circle using nestabilities and then gave a snow like effect using my white gel pen. The sentiment is embossed using white embossing powder.

  • Stamps: Stampendous Birthday Assortment.
  • Copics, White embossing powder, distress inks – Chipped sapphire and concord grapes, white gel pen.

March 4, 2016

Shopping bag repurposed into a gift bag

hero arts, copics

When I get these shopping bags from different stores, it really hurts me to just throw them away. They are so well constructed that they deserve a second life. On those lines I thought that it would be nice if I could alter them into gift bags! This is not my first attempt. I’ve done some in the past too. This was a shopping bag from Gap, I hid the logo using this card panel. The card panel was created by stamping the basic grey’s background stamp and then coloring it with copics. The border was created using double sided tape and gold foil.

  • Stamps: Hero Arts Basic Grey Large Petal Background stamp
  • Copics, gold foil and double sided tape

February 26, 2016

Happy Birthday

stampendous, free digital stamp

This was a free digital stamp that I downloaded. Printed it, colored it with copics and fuzzy cut it. The background is created using Stampendous Birthday sentiments.

January 29, 2016

Quilted tote bag

20151226_203326224_iOS

I made this bag for my friend and was very happy with how it turned out. It was also super simple! It took me probably 2 hours or so to get it done.

I used the tutorial from Make it and love it. Instead of using a heavy fabric, I used the double sided quilted fabric (I got mine from Joann) and for the lining I used regular cotton fabric. Also I added a magnetic snap on button so that the bug could be shut close. I prefer to be able to close my bags – that way I know things won’t just fall off. You can leave that off.

Fabric required:

  1. For the outer fabric: 27”
  2. For the lining: 19”
  3. One package double fold binding (for the handles)
  4. One magnetic snap on button

As far as cutting and sewing is concerned I followed the tutorial exactly. With few exceptions:

  1. Since my fabric was a quilted fabric, I only cut two strips for the handle (unlike 4 in the tutorial. Then attached the binding to it.
  2. I needed to attach the snap on button. So once I’d sewn the lining pieces together, I kept them right sides together making sure all they were aligned. Then marked a point on the two lining pieces – 2-3 inches from the top and at the center of the width of the bag. Then added my button at this point. Continue with the tutorial after that and ta-da! Your bag is ready!