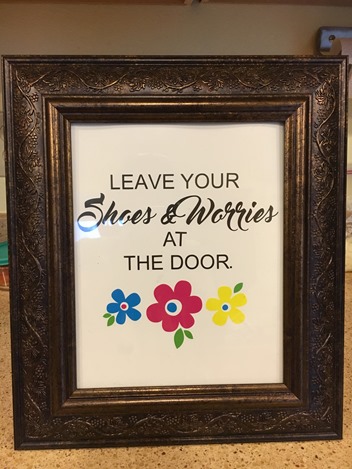
Using this quote that I found online I created this design. The font for “Shoes and Worries” is “master of break”. The flowers and leaves are a free design that came with the silhouette portrait. The design is cut in vinyl. For the flowers and leaves, I got 12”X12” loose vinyl from Michaels. I used a clear grid transfer sheet to transfer the design. Overall it was quite simple! We hung it outside, next to the door, with a shoe rack below it.
Showing posts with label Home Decor. Show all posts
Showing posts with label Home Decor. Show all posts
March 16, 2018


April 23, 2013
DIY: Dyeing a bedsheet
I decided that it was time our bedsheet had some coordination with the our duvet cover. However replacing a bedsheet does not come cheap. Especially if you’re looking at a king sized one. Also, if you’re existing bedsheets are in good enough condition then you don’t want to throw them. So I thought to myself – how I wish I could dye them. That thought was followed an internet search and I found a useful link.
Here’s a before/after comparison:

I knew the color that I wanted so I bought two bottles of RIT Scarlet Liquid Dye. The bedsheet and the pillows together weighed close to 2 lbs. So that would be 1 bottle of RIT (1/2 a bottle for each lb of fabric). Since I wanted a rich color, I figured I would go with 2 bottles.
Here’s a comparison with the color on the bottle and the actual color that it dyed to. I would say I got a more coral color than a Scarlet. Luckily coral works for me equally!

The instructions mentioned to use the washing machine for bug fabrics but I wasn’t too confident that everything would fly well and there would be no unforeseen consequences with that approach. So I went with the bucket/sink method.
I used a big Sterlite box and did this whole process within the confinements on my bathtub. The instructions say to cleanup afterwards using bleach. However I’m happy to report that I was able to cleanup my bathtub with baking soda. That might differ from one tub to another.
Wear clothing that is dark enough so that if a few drops of dye to splash on you, your clothes don’t get ruined. Or wear an apron, work clothes, you get the idea.
Steps to follow:
- Wet the fabric.
- Fill the box with hot water.
- Add salt.
- Mix in the dye.
- Now put your bedsheet and pillows in.
- Keep stirring for 30 minutes. The instructions say 30-60 minutes; but I was tired after 30 and wasn’t sure that I was seeing any difference so I stopped.
- Rinse, rinse and rinse the bedsheet and pillows in water.
- Did I mention rinse? Oh yes I rinsed them TEN times – yes you read that right! TEN!!!! If you’ve rinsed a king size sheet once then you know how I felt!!! No wonder on the instructions they don’t mention how long that might take!!!
- I washed the bedsheet in the washer and then dried it in the dryer.
I’m very happy with the result! With just $6 (I used a coupon at Joann for the dye) and a little (?!?!) muscle work I now have completely new looking bedsheets. Plus I don’t have to dump my good old bedsheets!
September 13, 2010
More craft fair stuff…
My first craft fair is going to be Nov 6! Yea! Here’s the information for it:
Woodinville Holiday Craft Fair
Woodmore Elementary School
12225 NE 160th St Bothell WA 98011
Nov 6, 2010 9AM-4PM
I’ve been making a lot of stuff for the craft fairs. Here’s a peek at what’s done…

Post-it note holders with mini gel pens. My DH packaged all of these! He made the bag toppers and stapled all of them! Isn’t that sweet of him?!?!

Magnetic message boards with a clothespin magnet and an embellished magnet eacg

Ornament gift card holders

More gift card holders
So you can see I’ve been very busy :) There are more things have done, once I’ve them completed I’ll post the pictures. I’m having so much fun making these things. There are so many things I’d never tried making because they wouldn’t be of use to me but thanks to the craft fair I can try my hand at multitude of things and it is so satisfying to let your mind be free – free to create anything! I think I can spend 24 hours a day making all this stuff!
Subscribe to:
Posts (Atom)