The numbers are cut using Silhouette Portrait. The stars are from a Lawn fawn stamp set and the hippo is from MFT Happy hippos stamp set. Colored using copics. Added glitter using Wink of Stella pen.
Another mother’s day card! Had so much fun making it! Love love love the multi-step stamping stamps from Altenew! I have used this peony bouquet for anything and everything! Cut out the sentiment using Portrait. Used distress inks for stamping.
Then covered the flowers in shimmer usking wink of stella pen. A closer look below.
Supplies: Altenew Peony bouquet stamp set, Distress Inks, Neenah solar white, Silhouette Portrait, WInk of Stella pen.
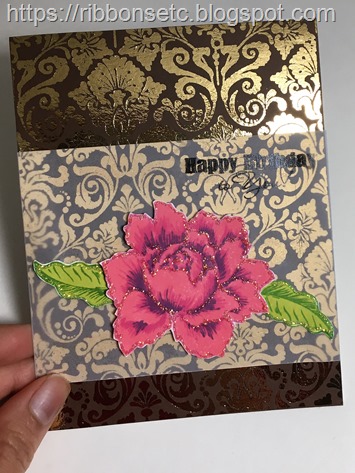
I’ve been having a lot of fun with stamp, copy and foil technique! Especially now that I have a template for the damask background, I can keep foiling away (as long as my foil doesn’t run out!).
I realized that so many times I draw my inspiration for colors and color combinations from the Indian sarees. Having done a few foiling with the dual-tone foil, I was thinking of what would be the appropriate color cardstock to use with gold foil. Then my mom’s saree came to my mind – it was brown with some gold design. I thought to myself how beautiful it would look to foil brown cardstock with gold foil (ironic since I never understand why my mom liked a brown colored saree 
The flower and leaf are stamped using distress inks and then outlined with stickles. I felt the shimmery background needed something equally glittery in the foreground. Vellum adds the softness to highlight the floral elements. I’m thankful for the vellum tape!
Supplies: Altenew peony bouquet stamp set, Impression obsession Damask background, Stampendous happy birthday, vellum, stickles, distress inks, Recollections cardstock, Mini minc machie, gold foil.
I was watching one of the foiling videos on youtube when I had a lightbulb moment! I can create foiled backgrounds using stamp, copy and foil!
What does it mean?
Isn’t that simple? The best part if you can keep the stamped image as a template and any time you need a background foiled use that to make a copy. That way you don’t have to stamp again and again (not for the same stamp at least). That is what I did – stamped the background stamp on a full cardstock sheet. So now anytime I copy it, I can get two background panels out of it. I did the stamping with my Misti. While printing I chose to use 65 lb paper because that’s easier to use in a laser printer.
I had a lot of fun playing with this! Especially with that beautiful multicolor foil – with pink and gold! It looks so beautiful! I made another one here:
I created the sentiment in inkscape, saved it as an .emf file. Then opened it in Word and printed out multiple copies of it on vellum. The double benefit here is that since these are printed, I can even foil the sentiment on a different card if I want to.
Misti and the mini Minc are two fun tools that I love playing with!
Supplies: Impression obsession damask background stamp, Versafine onyx ink, printer, Heidi Swapp foil, Mini minc, vellum
After making the previous card, I wanted to do some more with Peony bouquet. I feel it’s a very versatile set. You can do whatever you want with it – do multi-step stamping or stamp the outlines and color them; color them with copics, pencils or zig clean color markers; emboss them; color with pastel colors or brights. The options are endless for the kind of result that you want. All these options is what made me want to do more with that stamp. Something different every time.
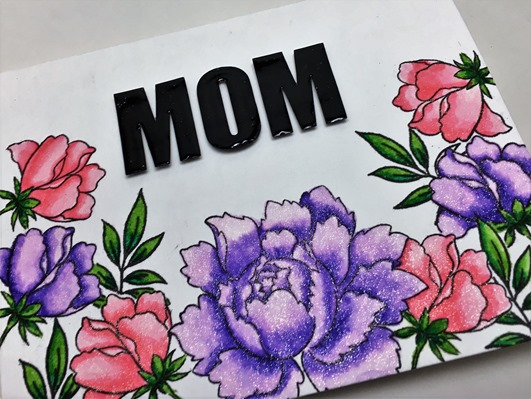
I stamped the flowers and leaves with some masking on watercolor paper. Initially I tried to watercolor using zig clean color markers. So I would wet the area that I was going to color and then drop the color using the markers. The big flower in the center is colored using that. While now I like that look more than the other flowers, when I was coloring it, it didn’t feel so. Also, somehow that kind of coloring wasn’t much fun for me – maybe because I wasn’t liking the results so much. The rest of the flowers I colored in the traditional way where I would color the darkest areas first and then using a watercolor brush spread the color to the lighter areas. I did have a lot of fun doing that! For the leaves I just blended the light green and dark green.
The flowers are covered in glitter using the Wink of Stella pen. The sentiment was cut using Portrait 2 and then covered with Glossy accents. A close look at the glitter and the glossy sentiment. Loved everything about this card ad just perfect for my mom or mom-in-law! I do want to add “love you” above the MOM – probably a handwritten message and then it’s good for either Mother’s day or a birthday card!
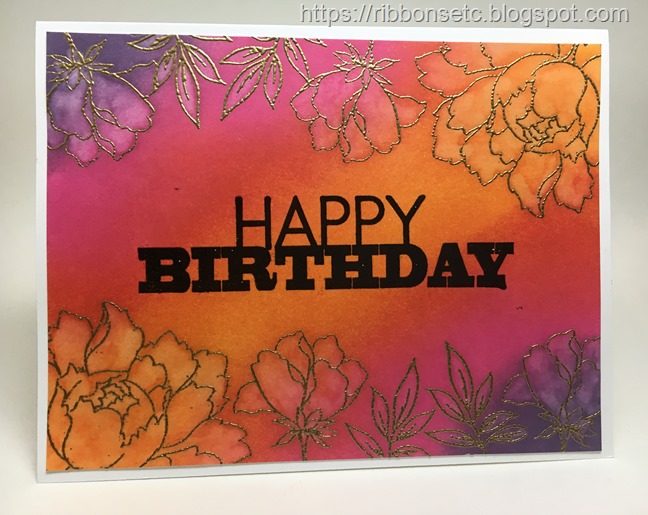
I saw this video from Jennifer McGuire where she used distress oxide inks and created the bleached look by drawing away some color using a water brush. Since I didn’t have distress oxide inks, I thought why not try it with regular distress inks as they too react with water. I first embossed the images in gold and then sponged with distress inks. Using a water brush I then brushed all the insides of the images, absorbing the color using a paper towel. The sentiment is embossed in black.
Supplies: Altenew Peony Bouquet, Hero Arts Birthday cling stamp, Gold embossing powder, neenah solar white cardstock, versafine black onyx ink, versamark embossing ink, Distress inks – Spiced Marmalade, Pickled raspberry and Dusty concord.

 ! Here’s another one. I love the simple look of this card! Cut the sentiment using Portrait as well. The stamp is colored with copics and then added some shimmer using Wink of Stella on the balloons and the bow. A closer look at the shimmer here:
I’ve been having fun cutting the chevron background with Silhouette Portrait 2 (used this design). Here I used the inlaid die cutting technique. I cut the purple glitter paper in chevron and then the antique silver glitter paper also in chevron. In the purple background I fit in pieces from antique silver and vice versa. As a result I was able to get two backgrounds! When I finish the card with the other background will share that as well. It was a lot of fun – I created four card bases using this background!
The peony was stamped using versafine onyx black and colored with Zig Clean Color Real Brush Pens. The leaves were stamped using the distress inks. The sentiment is stamped in black on vellum and then clear embossed.
If you look closely at the envelope (underneath the card), I stamped that too with peonies – in memento yellow ink. Looks really pretty!
Supplies: Altenew Peony bouquet stamps, My Sentiments Exactly Anniversary Innies and Outies stamp set, Misi stampipng tool.
I’d been waiting for the black friday sale to get a silhouette portrait 2. I sold my KNK Zing sometime back and this was my replacement for it. Zing was a great machine but much more powerful (and hence complex) than my needs. It was also quite big (like other 12” cutters). I leaned towards the Portrait 2 for a couple of reasons:
While the price wasn’t that much discounted ($160 vs $200 regular price), I did get $125 credit for Silhouette Design Store and 150 free designs.
Now going back to the card, I really like the clean cuts from the Portrait. For the font I used “bauhaus 93”. It’s one of the fonts that comes pre-installed on Windows. I got the stars from one of the free designs and the chevron background is this design in the store. The glitter paper is from DCWV Glitzy stack. Love that paper! It has glitter but not the kind that rubs off and the paper is very smooth. I used 65lb paper for the background.
Portrait cut settings:
I stamped the background using a gingham background stamp. Then die cut the background with the larger flowers. Also die cut the large flower in a dark blue cardstock. Using the inlaid die cut technique, placed the blue die cut flowers in the spaces in the background panel. To these I added the light blue die cut flowers and finally embellished with adhesive pearls. Decorated the card with stickles and stamped the sentiment. It looks so pretty! My goal was to make a masculine card with the gingham background but my girly brain always takes the turn towards flowers, glitters and pearls! Sigh!
Misti helped me in getting a nice background as I could stamp repeatedly till I was satisfied! Love that ability!
Supplies: Waltzingmouse Say it loud stamp set, PapertreyInk dies, Recollection colored cardstock, Impression Obsession cover-a-card Gingham background, adhesive pearls, Stickles, Misti stamping tool, Memento dew drops.
Had so much fun making this card with Altenew Peony Bouquet stamp set and my misti! I used a combination of distress inks and memento dew drops. The sentiment is from My Sentiments Exactly.
Supplies: Altenew Peony Bouquet stamp set, My Sentiments Exactly Anniversary Innies and Outies stamp set, Misi stampipng tool, Distress inks, Memento Dew Drops, Neenah solar white cardstock, Papertrey Ink Pink cardstock.
The hippos in th Happy Hippo set from MFT are so cute! The set has many hippos and all doing different things which gave me the idea to make this card. I wanted it to look like all these hippos are coming in different directions and eyeing the cupcakes. The circle die cuts serve as windows. Really loved how it turned out!
Supplies: MFT Happy Hippo, Zig Clean Color Brush markers, Stickles, memento tuxedo black ink, Bristol Smooth cardstock for watercoloring and PapertreyInk cardstock for the base.
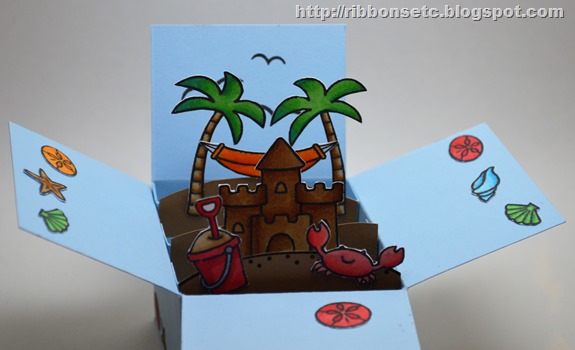
If you would like to know how to make these pop up box cards without using a die refer to my previous post. They are really easy to make and look so cute!!
For this one, I changed the dimensions a little bit. In the previous post, the box flaps and the box sides are the same dimensions 2” X 2.5”. In this I changed the box flap to 1.5” X 2.5” and the box sides are 2.5” X 2.5”. I think I liked the original dimensions better – although this looks good as well.
I used a strip of acetate cardstock to attach the bee so that it looks like it’s hovering above the grass. I colored the images using copics as well as prismacolor pencils. The grass die cut I had cut using my zing sometime back.
A closer look:
Supplies: Lawn Fawn Gnome Sweet Gnome, Copics, Prismacolor pencils, KNK Zing, acetate cardstock, Papertrey ink cardstock.
You must have seen pop-up box cards popping up (pun intended!) all over the internet! They look so adorable that I wanted to try some out! The good thing about these is that they’re pretty flat – of course not as flat as a single or double layer card but still not bad. Plus they don’t need additional equipment. Yes there are dies in the market for these but you can make them just using your paper trimmer!
Here are some more views
and more
Here’s what you need to make these:
Instructions:
Supplies: Lawn fawn Life is good stamp set, Copics, Papertrey Ink cardstock.
Made this card for Mother’s day. I think the sentiment is so apt for my mom – you’re out of this world! Sponged the background on watercolor paper using distress inks.
Supplies: Technique Tuesday Out of this world stamps, Zig clean color brush markers.
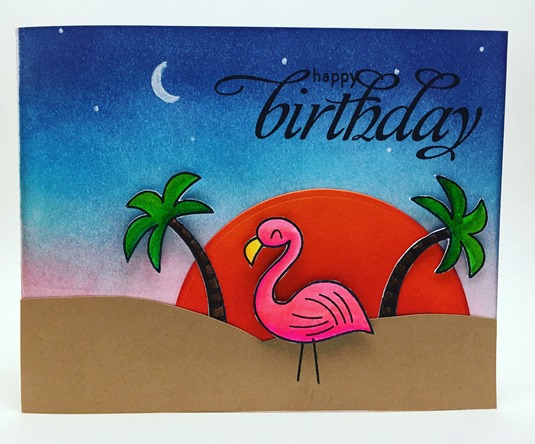
Really loved how this turned out! I’d been searching for different ways to use a flamingo stamp and then I came across a card that built a scene. That made me search for flamingo photos… one thing led to another and I wanted to create a beach sunset scene.
The sky was sponged using distress inks, the sun was cut using dies. The beach was fuzzy cut.
Supplies: Lawn fawn Gnome Sweet Gnome stamps, Lawn fawn Life is good stamps, distress inks, nestabilities, Waltzingmouse stamps Say it loud, Zig Clean color brush markers.
This is so addictive! Trust me you should try it out. Stamp an image, make a copy it on laser printer, foil it and then color it!
Wanted to try a more “mature” color combination after the bohemian colors I chose in the last one. Loved these colors too!
Supplies: Mini mic, Zig clean color brush markers, hero arts large petal background stamp, MSE sentiment stamp, gold foil, gold embossing powder.
This is my favorite stamp! I keep searching for new ways to use it and looks like I found another one 
Supplies: Mini minc, gold foil, zig clean color stamps, hero arts large petal background stamp, MSE sentiment, versafine black ink, neenah solar white cardstock.
A cute anniversary card. Had so much fun coloring this! Check out the checks in the picnic mat
Supplies: Zig clean color markers, Penny black stamp, My Sentiments Exactly sentiment, Versafine black ink, Papertrey ink cardstock, Smooth bristol board paper.
Another Art Impressions stamp colored with copics. Stamped the background using various sentiments.
Supplies: Art Impressions stamps, Copic markers, Versafine black ink, Papertrey ink cardstock, Smooth bristol board paper.