Showing posts with label reuse and recyle. Show all posts

June 15, 2012

Ribbon flowers

I’d made a ribbon flower following this tutorial and it had been lying around for a long time since I didn’t know what to do with it. Then I’d a light bulb moment and realized that I could use it to perk up my flip flops! So my flip flops went…

from mundane…

WP_20120611 8

to oh-so-pretty!!

WP_20120611 9

Don’t you love those?!?! The original flower I had was too big so I made two flowers out of it. In plain words, each flower is made from approximately 1.5 ft of 1.5” wide ribbon. I gathered it and then hot glued the base to a felt piece.

To take my ingenuity one step further, I put velcro on the base of the flower and the flip flop straps!

WP_20120611 10

So let’s say I want to switch colors or the white flower looks dirty, it’s a piece of cake to change the flower!

March 12, 2012

Up-cycling a shopping bag into a gift bag

Sometimes something as mundane as a white paper bag can inspire you? Or is it that the white paper bag is a clean canvas which is natural to inspire you? Either ways, this Lacoste shopping bag inspired me to convert it into a cute gift bag! I love how it turned out! Don’t you think it would be perfect for a kid?

lacoste_bag       lacoste_bag_upcycled

I cut the following using Cricut:

  • blue background label using Shapelies.
  • The hippo and phrase using Create a Critter cartridge. The hippo is cut at 3.5” and the phrase at 2”. I added goggly eyes to the hippo and glossy accents to the flower and the hearts in the phrase.

I design is on both the sides of the bag.

  • Paper: PTI blue and generic paper from Joann
  • Googly eyes, glossy accents, Cricut, SCAL, Create a critter cartridge.

March 30, 2011

From Ugly Betty to Bold and beautiful

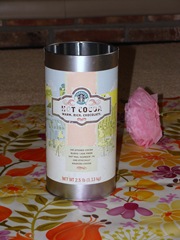
I’d been waiting for this Starbucks Cocoa tin to get empty so that I could put it to some good use Winking smileEvery time I got some cocoa from it, I would think to myself – “oh what a beautiful candidate this is for altering!”. One day I was lucky enough and the last grains of cocoa were used up from that tin by some Samaritan (in all probabilities it was me) and then a jubilant me put it in the dishwasher to get it ready for the d-day!

I figured that the tall and thin structure of the tin would make a beautiful vase. If there’s a vase, there need to be flowers. I’m not one who can dutifully pick the flowers from the garden and replenish the vase everyday. So artificial it was, for me. Handmade? Or readymade? no handmade would be better. But ready made would look more natural. The tussle began and handmade won the war. Thus began the search for tutorials for handmade flowers. Lucky for me I’d been recently experimenting with some paper flowers and had hit upon just the right tut. Here it is. The only thing that I would like to add is that alternately opening the layers from opposite sides worked better for me than opening all on one side and then the other.

So here’s a peek at the tin that was
DSC06098

and what it is now

DSC06099

Doesn’t it look perfect for spring?!?!

I used a 12X12 scrapbook paper to cover the tin. It fell a little short – so I made two pieces of it. 6 X 12 each. Covered up the little slit on both sides with a black and white ribbon! Nobody would ever know that I did that because I was short of paper!! If you look closely at the photo you can see the ribbon on the right side. My apologies for the blurry photo – I didn’t realize it then.

The flowers are made from tissue paper. Since it’s spring I wanted a pastel theme. Don’t they look gorgeous?!?!?

This masterpiece now sits on our dining table. Not only did I save a tin from going to the landfill but also created a beautiful centerpiece at no cost!!

April 23, 2010

Create Your Own Friday #16 – Backpack bag/box and Earth Day!

I saw this backpack on SCS and it looked so cute that I wanted to make one. I did make a few changes to it, mostly so that I could flatten it out and mail it if I wanted to (in case I decide to put it on my Etsy shop). The one on SCS would be hard to mail. They would make cute birthday favors for a little girlie. Not sure what I’ll do with it – or the other boxes that I keep making :) – but I love making them. Someday God will find a good way to use them :)

DSC04822

I also reused the golden cord that I’d saved from some packaging.

Supplies: DCWV CS and PP, reused golden cord, golden eyelets, grosgrain ribbon, crop-a-dile.

January 11, 2009

A wall decor – Reduce, reuse and recycle

DSC01683

Have you had a moment where you were totally awed by what you made? For me such moments are rare and today I had one such moment :). I’d some idea before I jumped into making this wall decor but when I looked at the final result, I said to myself “WOW!” :-D.

Inspiration struck me when I looked at all the old “laddu gopal” (it’s the name given to Krishna’s idol  when he was a baby/toddler”) dresses. Every year when we celebrate the birth of Lord Krishna, we change the clothes of our deity. All these years I’d been collecting the old dresses because they were so beautiful! I always thought that I could use them to make something and finally I did :). So what does a laddu gopal dress look like – here’s a photo:

DCF 1.0

[Photo courtesy: The Krishna.com store]

I removed the top portion from the dress so that I’d a circle with a hole; dressed up the hole, pasted it onto round coasters for a good backing and that’s it!! So here’s my latest on “Reduce, reuse and recycle”.