
Yet another digital stamp.Colored it using copics. Don’t remember the embossing folder that I used here 
Showing posts with label Technique - Dry Embossing. Show all posts
Showing posts with label Technique - Dry Embossing. Show all posts
March 18, 2016
Another digital stamp


July 28, 2014
It’s time to say…

To create the background: dab salty ocean and tumbled glass on Honeycomb embossing folder. Spritz it with water. Emboss a watercolor cardstock using the embossing folder.
Clear embosssed the cuckoo clock. For the alarm clock, stamped it in black on white cardstock and then colored it with Spectrum noir markers. Stamped the sentiment on vellum using Milo’s ABC.
- Stamps: Hero Arts Cuckoo, Lawn Fawn Milo’s ABC
- Papertrey ink cardstock, vellum, distress inks, versamark, memento tuxedo black
June 9, 2014
Coloring on vellum

Another card where I used coloring on vellum. Embossed vellum and colored on the reverse side using spectrum noir markers. Embossed the sentiment using white embossing powder.
- Stamps: Lawn Fawn Milo’s ABC, Waltzingmouse Say it loud
- Papertrey ink cardstock, vellum, white embossing powder, stickles
December 31, 2013
Bird Song collection–Birthday

- Paper: Graphic 45 Bird Song, Papertrey Ink Cardstock
- Stampendous birthday wish, Memento ink, Walnut Stain distress ink. Swirls embossing folder.
November 7, 2013
Bird Song collection–Celebrate

- Paper: Graphic 45 Bird Song, Papertrey Ink Cardstock
- Waltzingmouse Say it loud stamps, Walnut stain distress ink, textiles embossing folder.
January 21, 2013
When the world says

- Stamps: Hero arts blossom art
- Paper: PTI Crafter’s companion
- Lifestyle crafts sequence EF, spectrum noir markers
January 16, 2013
Butterflies

The butterflies are cut using cricut. The background was created by watercoloring with distress inks, then embossing and finally burnishing with inka gold.
- Paper: PTI and TPC
- Distress inks, watercolor brush, inka gold platinum, cricut, SCAL.
January 14, 2013
Cuckoo!

Can you believe this almost a one layer card?!?!? Sponged the upper half with tumbled glass and the bottom half with Dried marigold. A painter’s tape is very helpful in masking and keeping the card in place while you sponge!
Masked the bottom half and stamped polka dot background. Embossed the bottom half with swirls EF. Sponged lightly on it with spiced marmalade. For the strip, sponged the spiced marmalade directly onto white CS. Colored the image with spectrum noir markers.
- Stamps: Hero Arts Cuckoo
- Paper: PTI and CC
- Swirls EF, distress inks, rhinestone, spectrum noir markers.
January 9, 2013
I love love love you
I made two somewhat different cards using the same stamps.

Stamped the image in memento and colored with spectrum noir markers. Sponged the card vase with Spiced marmalade, barn door and broken china. Stamped the border repeatedly with fired brick.

In this card I simply embossed the card base.
- Stamps: Penny Black I love you, Waltzingmouse Wild West borders
- Paper: PTI and Crafter’s companion white
- Spectrum noir markers, Lifestyle crafts Label embossing folder, distress inks – spiced marmalade, barn door, broken china and fired brick.
December 17, 2012
Happy Birthday
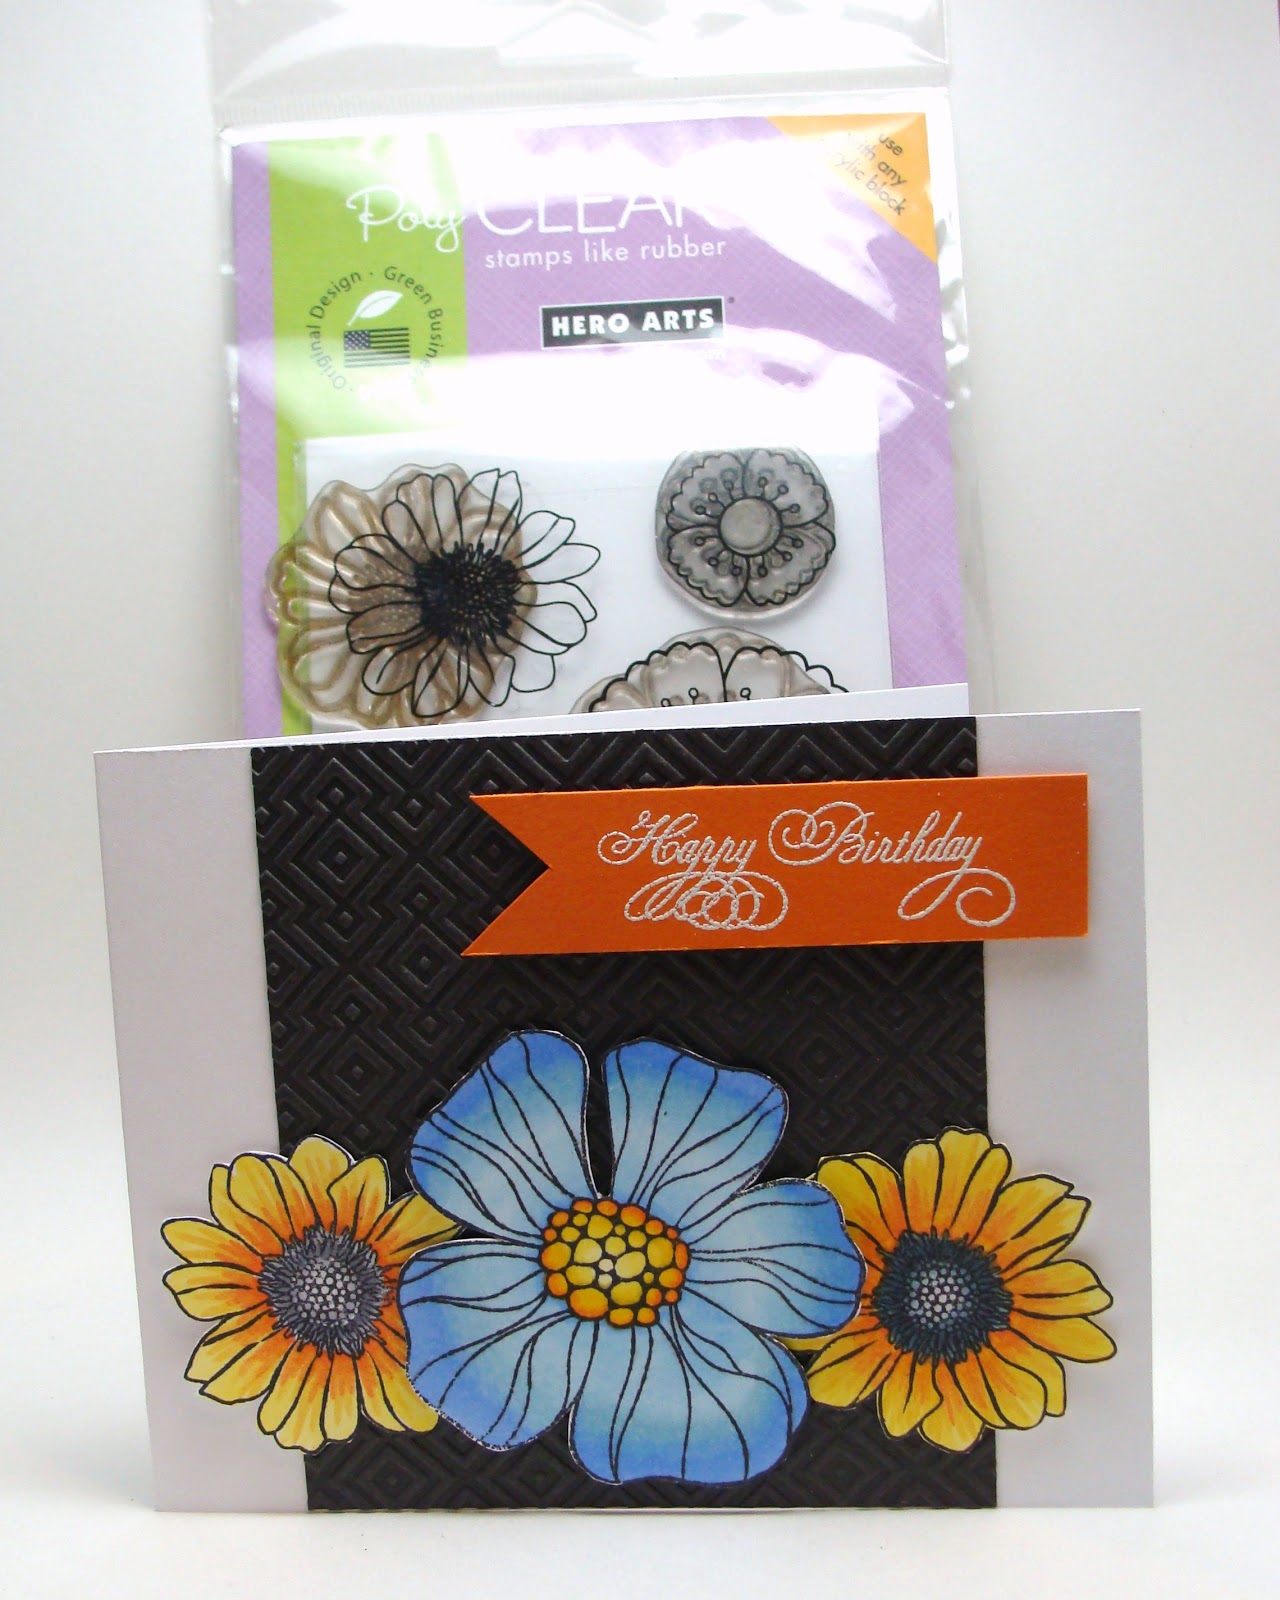
This is the first card I'm posting where I've used Spectrum noir markers. They're alcohol markers like Copic but very reasonably priced! So far I've been having fun with them. I haven't used copies so I can't compare but I can tell you that I've no regrets buying these markers. I now own most of the 6 packs.
The flowers are colored using crafter's companion cardstock - I found it to be awesome for coloring. It was so easy to do blending. I was having a hard time blending on PTI CS.
Sending this card to the following challenges:
Supplies: Lifestyle crafts Sequence embossing folder, PTI and CC CS, spectrum noir markers, white embossing powder,HA Blossom arts stamps, flourishes flourished words stamps
October 17, 2012
My first with Inka Gold!
When I was at Stamp-a-doodle in Bellingham I saw some samples using Inka Gold. This was the first time I came across this product and I was so impressed! It comes in a lot of colors so I figured I would give one a try! This is my first card using Inka Gold! I love that metallic look – isn’t it so cool???

I embossed Smokey Shadow CS with Textile CB folder. Rubbed Platinum Inka Gold over it with finger. At the back of the CS I drew a rectangle and then cut it using a craft knife. Stamped the sentiment on a scrap of yellow PP. Adhered it to the card base and the popped the embossed panel on top of it! Simple. Easy. And. Beautiful. I love such cards! I think this metallic look would work great for masculine cards!
July 18, 2012
Stretch Your stamps–outline stamps (day 9)
I white embossed the flowers on a color block pattern paper that I created. Also white embossed the leaves.
Once again it’s the blossom art stamps – seems like it’s hard to make a card without them!

- Stamps: Hero Arts Blossom Art, Waltzingmouse Say It Loud
- paper: PTI kraft and others
- Cuttlebug Swirl embossing folder
April 20, 2011
Wedding gown shaped cards
Quite sometime back I’d seen some wedding favor boxes shaped like the wedding gown. So one day I decided I wanted to make cards in that shape. I designed the card in SCAL and was very happy with how it turned out.


I cut the file such that the card size would be approximately 4 X 5.25" inches. Embossed the skirt part of the gown using Divine Swirls embossing folder. Tied a ribbon at the waist and accented it with a adhesive backed pearl. Easy peasy, isn’t it?!?!
You can download the SVG file or if you want to cut it by hand here’s a PDF file. You can cut two of these cards from a single A4 sheet using the PDF file. These files are for personal use only. Please do not sell the files.
- Paper: Papertrey White and Hibiscus burst
- Others: Cricut, SCAL, Ribbon from Michaels, Adhesive backed pearl, Cuttlebug Divine Swirls embossing folder.
March 16, 2011
A few more lamp cards
You can see my first lamp card here. It has most of the instructions on how I made these cards.
I made the template as an SVG file in Inkscape and then cut it using Cricut and SCAL. Then embossed the bottom half of the lamp using cuttlebug folders and big shot. Attached the lampshade using foam dots.


All sentiments are printed on computer.
- Paper: PTI CS and DCWV Citrus PP
March 10, 2011
Tuesday Trigger and the journey of a card
I’ve been itching to make a card since I saw this week’s Tuesday Trigger. Especially the colors and the flower – they spoke to me. They were literally begging me to make a card based on them. So how could I disappoint them?!?!

Hence began the journey of a card.
Stop 1: I must make a tissue paper flower – that would look so lovely. An orange one. Oh no!! I don’t have orange tissue paper. Who used all of it?!?!
Stop 2: Never mind. Forget the trigger colors, I’ll make-do with pastel yellow. Flower done. Looks smaller and not as fluffy as it should be.
Stop 3: Make another flower. This time bigger and fluffier. Oops! This is too fluffy for a card – good for home décor but not for a card.
Stop 4: Think, think, think. Ah! The final destination has arrived. Use scallop circle nestabilities to make a flower.
Hence was born the flower on this card.

I cut the layers of the flower using scallop circle nestabilities. Inked the edges using Versacolor inks. Cut the petals.Then curled the petals using a pencil. Glued all the layer together, at the center. Then cut a small circle for the center. Dotted it with liquid pearls (big mistake! always do this step after your card is finished!). Cut the leaves using Cricut at 2.5 inches height. Embossed the sentiment with gold embossing powder. Embossed the card using swiss dots embossing folder. Glued the flower and then the leaves to the card. Popped up the ends of the leaves on foam dots. Dressed the petals with Diamond stickles.
A closer view.

- Stamps: Flourishes Flourished Words
- Paper: PTI Berry Sorbet, Pine Feather, Aqua Mist, Summer Sunrise
- Others: Cricut, SCAL, Liquid pearls, Stickles Diamond, Gold embossing powder.
March 4, 2011
Lamp card
I’d had this design in my mind for a long time and was very pleased to see it executed


All the CS – the lampshade, lamp card and tag - was cut using Cricut, SCAL and an SVG file I created. So was the lampshade. The card was cut at 10.5 inches in height which resulted in a card approx 5.25” in height and 4” in width. The inner tag was cut at 2.5” in width. I found that for the outer tag I’d to remove the “Keep proportions” options to give a uniform border. The base of the lamp was then embossed using Textiles folder. The sentiment was printed using the computer. I first printed the sentiment on a copier paper and then taped the tag on top of it using a double-sided tape so that the sentiment would print at the correct position. That worked like a charm!! It saved me so much trouble!
- Paper: PTI Simply Chartreuse, White and DCWV DP
- Others: Cricut, SCAL, Brads, Cuttlebug Textiles embossing folder.
March 12, 2010
Create Your Own Friday #10 – Take-it-out!
Yes! Take out that cardstock you’ve been hoarding for the last 6 months (or a year?!?!) or that punch that you haven’t stolen a glance at since you bought it!
The purpose of this CYOF is to bring out of your stash something that you haven’t used since a long time. We all know that we buy our supplies its as if the world would end if we didn’t get them but after they enter our home sweet home, sometimes they disappear into the black hole which is our supplies. So lets take a moment to look at what we have and what we haven’t paid much attention to and give it the much wanted love :)
So I took out of my stash this antique gold cardstock that I bought last September and haven’t used since. Of course before I bought it I always thought that not having it is the biggest hurdle in me not being able to make the most stellar projects! The other thing that hasn’t got much love but is a more recent addition to my family is the swiss dots folder.
However, now that I took them out I think they danced together to create this perfect piece. Have you ever thought that reality could be better than a dream? No? Me too but this card turned out be so much better than I had dreamed. Too much philosophy for a craft blog, eh? :)

It somehow reminds me of a saree – I guess its the shimmer and the elegance of the card!
Supplies: Antique gold CS, Bazzill CS, CTMH Decoratve dainties, gold EP, Oval nestabilities, satin ribbon, sheer ribbon, rhinestone.
February 27, 2010

September 13, 2009
Partial Embossing using cuttlebug – a tutorial
I saw this card and wanted to make a card with a similar embossed border. Presently there is no existing die that I could use as it is. So I started scouring the internet to see if anyone had done this. To my dismay none had. However, looking at various other things that people had done with their cuttlebug embossing folders, I got an idea about how I could achieve this look. So I got working and lo and behold! The results were fantastic – I got the look I wanted! Here’s the card I made:

The center image is printed on gold shimmer cardstock and the base is also shimmer cardstock – don’t you simply love it?!?!? I do!!!!
Ok, here’s the tutorial.
What you need:
- Some cardboard pieces – I cut them out of cereal boxes.
- cutting knife/blade
- Die-cut machine and its paraphernalia
- Embossing folder of your choice
Steps:
- Take 3 pieces of cardboard. The number of pieces will vary depending on the thickness of your cardboard. I’m using cardboard from cereal boxes so that should give you some idea. The size of each piece should be a little bigger than the embossing folder that you’re using. Other than that the dimensions are not so important. In the second photo is a side-by-side comparison of the size of the cardboard piece with the acrylic plate of my big shot.
- Draw the outline of a front of an A2 card on one of the pieces. This means draw a rectangle of 4.25 X 5.5 inches on the cardboard such that the longer side of the outline aligns with the longer side of the cardboard. I use a piece of cardstock to draw the outline.
- Cut a window in the center of this outline. This is the area that you do NOT want to emboss. Using this window as a guide, cut a window in the other two pieces too.
- Glue all three pieces together – aligning the windows.
- Now assemble the sandwich.
- Now roll the sandwich through your die cutting machine.
- Check the cardstock to see if the embossing was to your liking. I found that the embossing was lighter than I expected.
- So I added a shim (another cardboard piece – it doesn’t need to have a window or anything). You can also use some cardstock pieces. So my new sandwich is: multipurpose platform, piece of cardboard, the glued cardboards, embossing folder, acrylic plate.
- Roll it again through the die-cut machine.
- If you want the frame look on the inner rectangle, just score lines there. I used my scoring blade to do it. If you don’t have one you could use a ball-point pen that’s NOT working.
And you’re done!
 |  |
 |  |


 Multipurpose platform, with the cardboard thing we created in the step above, followed by the embossing folder with the cardstock inside. |  Note that the embossing folder is placed such that the cardstock aligns with the outline that we drew in step 2. |
 Acrylic plate on the top Acrylic plate on the top |


September 6, 2009
Angels and Fairies; and CPS 131
This stamp is extra special to me as it was given by my DF – a non-stamping DF at that. I’d been looking for a way to use it: it seemed too fine for my coloring skills and embossing seemed to be the perfect way. I also want to try paper piercing with it. It looks awesome when embossed as you can see in the card below. So this is my entry to the PWC “Angels and Fairies” and CPS 131.
It was after such a long time after which I was using a rubber stamp as opposed to a clear stamp. It sure felt good!

- Stamps: Dunno as its a gift
- PP and CS: Bazzill and Wasau
- Silver EP, Sheer ribbon, flowers, dew drops.
Subscribe to:
Posts (Atom)